Showing posts with label Chipboard. Show all posts

Wednesday, November 21, 2018

November loveliness from Sue Smyth


Mad Hatters Tea Chest 
and 
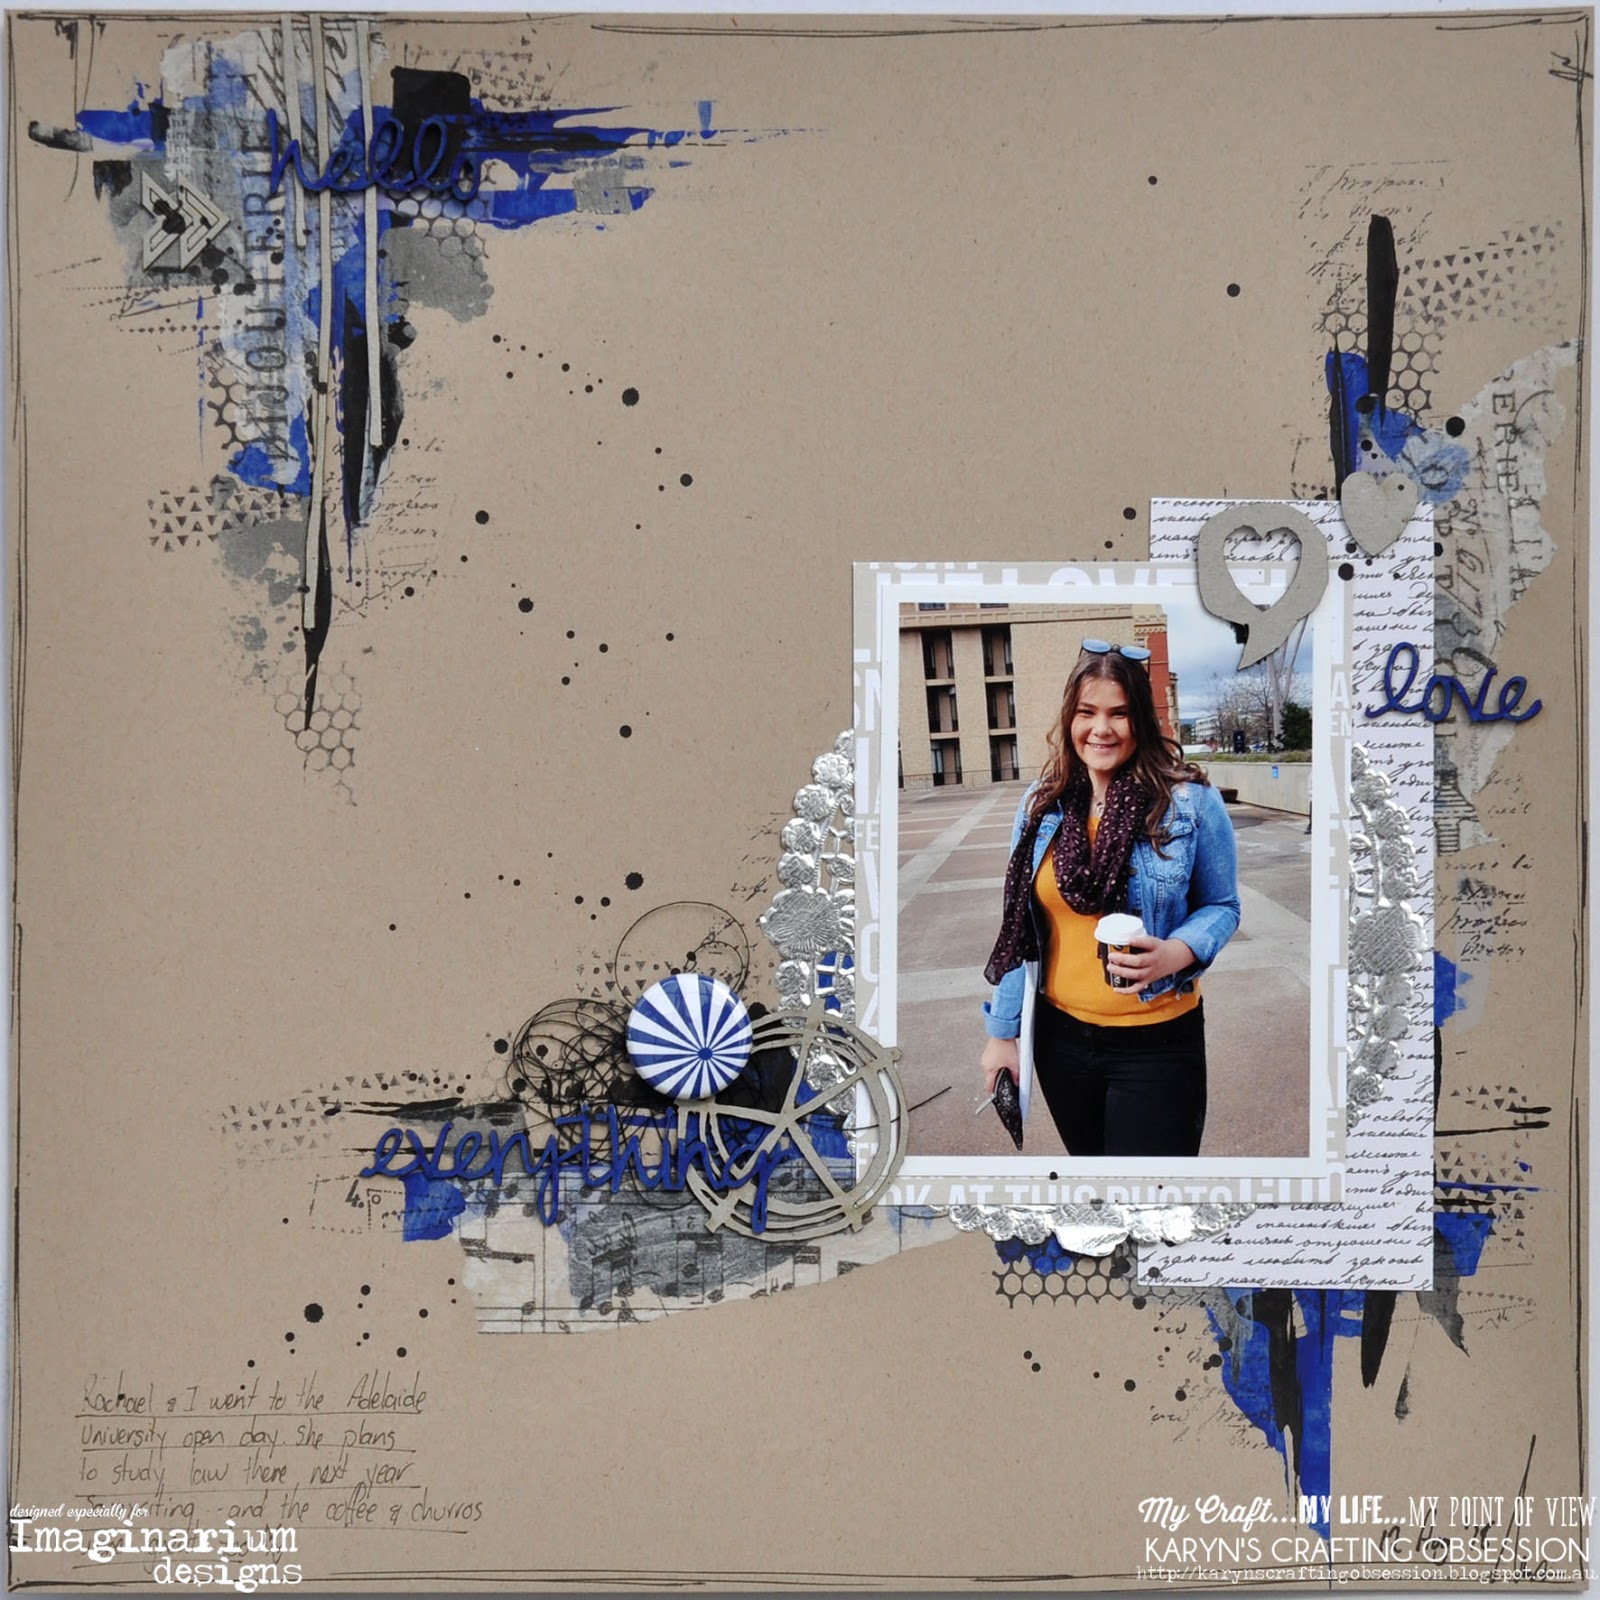
Catcher of Dreams Layout 
By Sue Smyth 


This month I am sharing two projects I have taught around Australia this 
year, first is a small box for holding tea with an Alice in Wonderland 
theme. Second is a layout using my Artsy treasures and ID chipboard to 
Create a Dream catcher style layout.


I have cut down one of the borders to create a frame on the lid 
of a Graphic 45 kraft box 


I added feet (wooden beads) to give the box some height and 
definition.


The spine is decorated with a playing card and resin bracket.


Inside I have used torn up text to cover the kraft surface, (and the outside)


And I have decorated the tags that came with the box 
with Alice in Wonderland Artsy Treasures.


To top the box is a resin Mad Hatter, he is painted with Inka 
Gold colours and placed over the ID frame.


Next is my layout.............


I love doing a mixed media layout and intend to do more, I create 
my own background to suit the photo.


The ID feathers are painted with gesso first, then I give 
them a second stippled coat, and dry off 
to bubble and blister.
Then I have coloured them with Scribble sticks and water.


I have used the scribble sticks to colour the flowers too, and to colour
the compass ID chipboard.


I have snipped the compass/clock chipboard, around the 
centre to create 2 pieces, and threaded cotton 
around the larger one to make a dream catcher.


Here are some close ups.


Oh and I used the same elements (except the photo)
to make a journal cover. Which I secretly like 
even better lol.


Here are some close ups of the prills and 
feathers etc.


I hope you are inspired by my projects and bonus
book, and 


some of the chipboard used 


Happy Crafting 


Wednesday, November 14, 2018

Drink Coasters & Chipboard

Hi Everyone

Wendy back this month with a crazy idea I had a while ago which was to pair some retro looking drink coasters with some chipboard and pop it on a card front!!! I know bizarre but it works if you are chasing a real retro look for your cards - and also so you can see that nothing is out of the question when it comes to what you can throw on the front of your card!


You can see that the chipboard really sets the card off and goes really well with the retro feel.  The details of the chipboard I have used is below.  Have a great week.

Keep Creating!
Wendy


Details of the chipboard


IDW0094


IDW0092


Friday, November 9, 2018

November projects - With Karyn Schultz!

Hi Imaginarium Designs lovelies!!

It's Karyn here and today I have 2 scrapbook pages to share with you.

This first scrapbook page includes a photo of Jessica and I after her Grade 1 piano exam - enjoying pancakes and hot chocolate!!
I've used the new Cocoa Vanilla Studio Midnight collection, a CVS "colour me happy" flower cutfile, and gorgeous free "split heart" cutfile from Paige Evans (here). The heart cutfile was so beautiful I wanted to keep my page simple - I've just backed a few sections of it with patterned paper.
I've matted my photo with some more patterned paper then added some embellishment clusters using ephemera, flair, another floral cutfile.
I've left all of my chipboard raw - I think it suits the layout! Lastly I've added some splats of black paint. 
Imaginarium Designs chipboard I've used includes 

Smile laugh live love: Code IDW0087
Nats Hand Drawn leaves : Code IDD0044
Birdcage, small : Code IDT0019 

The next scrapbook page includes a photo of Rachael and I at a recent University Open Day.
I started with a sheet of 12x12 white cardstock  and used a painting with plastic technique to apply Lindy's magicals in coordinating colours to the top left and bottom right corners of my page.
I loved the background to much (so much amazing shimmer) I wanted to keep it as a feature so i kept my page simple. I've used the new Cocoa Vanilla Studio Midnight collection (a strip of paper and ephemera).
I painted the chipboard with Lindy's Magicals too!
Imaginarium Designs chipboard I've used includes 

Nats hand drawn stemmed leaves: Code IDD0045 
A Dream is a wish your heart makes : Code IDP0106
Heart Flourish - new and coming soon!

Thanks so much for stopping by
Crafty Hugs xx
Karyn

Thursday, October 11, 2018

Monochromatic Cards With Chipboard

Hey All

It's Wendy back with some cool cards and this month I have gone a little monochromatic - which according to Mr Dictionary it means "containing or using only one colour".  I really like this style of card and chipboard lends itself really well to this technique as you can use a variety of different mediums to colour the chipboard.

For the first card I have gone green and embossed the chipboard with jade embossing powder.  In the second card the chipboard is a little harder to spot but it's there ......... yep the red glitter square is it.


The chipboard I have used is listed below - so go and give some monochromatic cards a go!

Keep Creating!
Wendy


IDFL0004


IDS0046

Tuesday, October 9, 2018

October projects - With Karyn Schultz!

Hi Imaginarium Designs lovelies!!

It's Karyn here and today I have 2 scrapbook pages to share with you.

The October Colour of the month at Imaginarium Designs chipboard is "Blue". We would love for you to join in the challenge and create a project using Imaginarium Designs chipboard that is inspired by the colour Blue then send a photo to Jane at sales@imaginariumdesigns.net.au (before 25th October) and you will be in the running to win a fabulous chipboard prize pack!! 

My first scrapbook page has a photo of Rachael enjoying a coffee when we were at a recent University open day - OMG ... Uni next year, where did the time go!
I started with a sheet of 12x12 Kraft cardstock  and used a palatte knife to apply my fav Dina Wakley paints to the page (black, lapis, medieval, elephant)
I then added some stamping, then used gel medium to adhere some strips of tissue paper to the page. 
I matted my photo on papers from the Teresa Collins Urban Market collection and a silver paper doilie. 
I left some of the chipboard raw and coloured the words with a blue Posca marker. 
Lastly I added some cotton thread, a flair, splats of black paint and handwritten journalling.
 
Imaginarium Designs chipboard I've used includes 

Loolabelles chevrons #2: Code IDDL0022
Lou's frame and bars 8inch : code IDD0053
Love grow hello : code IDW0083
Everything Everyday today : code IDW0082
Loulabelle's callouts : Code IDD0046 

My next scrapbook page has a photo of Jessica dressed up for Book Week. She was dressed up as Emmeline from "The Eye of the North". Emmeline escaped reality by reading - it was her treasure, and it is also Jessica's treasure!
I started with a sheet of 12x12 white cardstock  and used a painting with plastic technique to apply Prima Watercolor Confections "The Classics" to my page. Then I added some stamping using KaiserKraft, Prima and Carabelle Studio stamps.
I matted my photo on papers from the Teresa Collins Urban Market collection and torn strips of tissue paper. 
I left some of the chipboard raw and coloured the words with a black Posca marker.
Lastly I added some cotton thread, a flair, splats of black paint and handwritten journalling.

Imaginarium Designs chipboard I've used includes 

Loolabelles chevrons #2: Code IDDL0022
Nat's hearts 1 : Code IDD0042 
lower case alphas: Code IDALC0001
Hello : Code IDW0102 
Thanks so much for stopping by
Crafty Hugs xx
Karyn