Showing posts with label Doilies. Show all posts

Tuesday, March 8, 2016

Catching Dreams and Preparing for Easter

Well, hello there everyone! It's Julianne joining you today, and I will be sharing two projects that I have created, using the wonderful Imaginarium Design chipboard. 

Let me start with my dream catcher. This project is not for the faint of heart (as I learnt the hard way, lol!). I had a wonderful time creating this masterpiece, but it definitely took a little longer than I expected. At least I'll know better for the next one. :)


The best thing about this project is the limitless possibilities in regards to colour schemes and the details added. And Imaginarium Designs makes several different doilies, so there are plenty of options for the centre focal point. 


I have used the Kate Doily for my centre piece, simply embossing it with embossing powder, and adding rhinestones at several different points to add sparkle. 
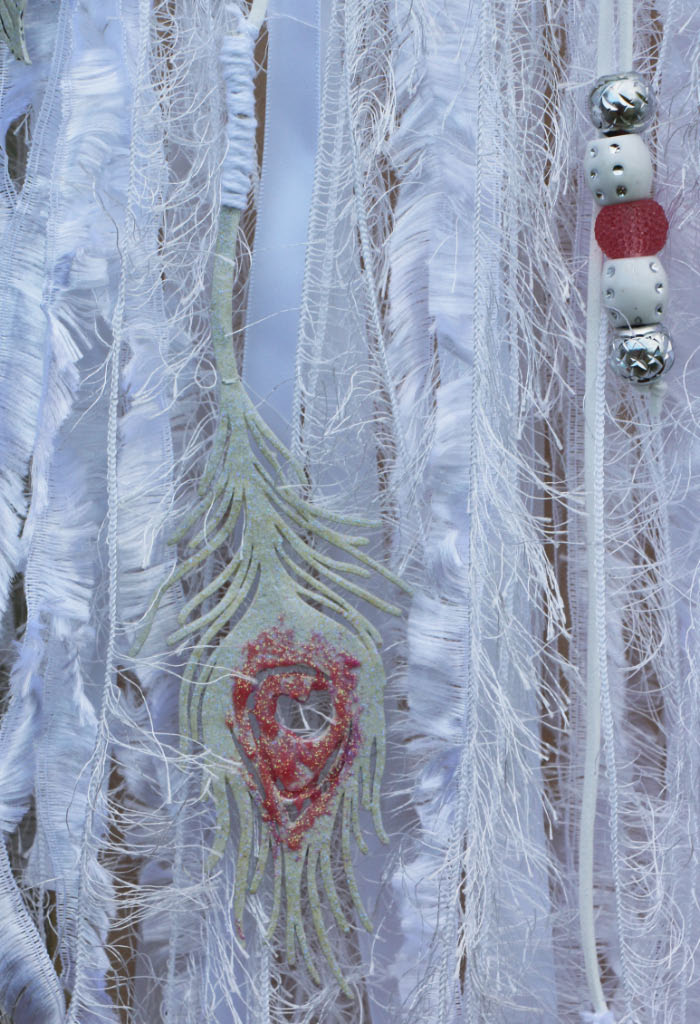

I have used both the peacock and skeletal feathers (in different sizes) on my dream catcher. They have been embossed with embossing powder, then highlighted with pink glitter glue. 


I have finished the bottom of the dream catcher with strips of ribbon, both smooth and textured, some leather binding, and beads. On the top half, I have added roses and flowers, randomly placed large rhinestones, and some Prima star vines. I've finished with a spray of pink mist on several of the flowers. 

IMAGINARIUM DESIGNS PRODUCTS USED:


.............................................................................................................

My second project is a quick and simple Easter jar, created with an empty Moccona coffee jar. 


Seriously, this project took me all of maybe 20 minutes to complete. My daughter asked for a jar to keep her mini Easter eggs in, and this was the end result. 


I wrapped burlap ribbon around the jar, and adhered it with extra strong tape. I then added a strip of Easter paper over the burlap and finished with a layered cherry blossom flower, felt flowers and resin roses in the centre. I decorated the edge of the paper with teal rhinestones (because a girl ALWAYS needs a little bling!). 

I have glued a rabbit, in a basket, to the jar lid, and finished with two strips of ribbon around the lid edge (one yellow and one teal). 


The cherry blossom has been created using Zing Embossing Powder in teal, then layering each piece on top of the other, to create a raised flower. 

My daughter now has her mini egg jar, and is very happy. :)

IMAGINARIUM DESIGNS PRODUCTS USED:


Thank-you so much for stopping by and joining me today. It has been a pleasure being able to share my projects with you. Don't forget to leave a comment and a little love, and you will automatically be entered into the draw to win a prize back of Imaginarium Designs goodies. 

You can also find Imaginarium Designs on Facebook

If you would like to view more of my work, please visit my blog: 


Until next time, 
happy scrapping and crafting,

JULES


Friday, January 8, 2016

A Card For Someone Special!

Hello everyone!
Julianne joining you today.  

Have you recovered from the New Year celebrations? 
Are you ready to get back into creating? 

I thought I might inspire you with a gorgeous easel card that I have created 
for a young girl (family friend) who is about to become a teenager. 


I wanted to create a card that was pretty and feminine, but not overtly "girly".
And something that she can treasure and put on display, to remind herself that
she is now a teenager, and young woman.


I have used Brown-Gold Inka Gold to cover the window, shutters and heart picket fence.
It was the perfect shade to co-ordinate with the Marion Smith papers.
I love using Inka-Gold because it covers chipboard smoothly and effortlessly, just by rubbing it on with your finger, and it washes off your finger with a baby wipe, or soap and water.  


Originally the picket fence was too long for the card, so I simply cut it shorter to the required length. 

The Embellishment 8 chipboard design has been covered with Liquid Pearls, and a coating of pink mica powder that has been mixed with a gel medium, to create the perfect shade of pink. 


And I have finished off with flowers, rhinestones, and a splash of kindy glitz. The flowers have been coated with Glimmermist Tattered Angels Dazzling Diamonds spray, and I have used Glossy Accents on both the hot air balloon and pocket watch.  

.............................................................................................................................................

When I am lost for inspiration, I usually turn to Pinterest.
I am seriously, seriously addicted to the Pinterest site - it is NEVER boring and there is always so much inspiration to be found.
This layout was created with a sketch  that I found on Pinterest.  


I am thrilled with the outcome of this layout. I love how I was able to make it my own,
 adding stamping, ink splatters, hearts, gold touches, and journaling. 


Here's the sketch and link - it is originally from the Fee Du Scrap Forum site
I fell in love with this sketch the minute I saw it. 


All the chipboard has been coloured using Gelatos. I used the basic Gelatos on the hearts, both big and small, and a metallic blue Gelato on the doilies. I simply rubbed the colour in with my fingers, and scraped off any excess before sticking the chipboard to my page. So easy. I then finished by coating the big and small hearts with Glossy Accents for added shine. 


I wanted to do something a little different with the doilies, rather than have them just sit there, all plain and boring. So I came up with the idea to add rhinestones to the inside of the circles that surround the doilies. I am totally happy with the end result. The doilies no longer look like doilies, they look like unique circular embellishments. 


By layering and swapping images in the sketch for alternate shapes, it is quick and easy to create a layout, and to find your inspiration again. So the next time you are feeling a little lost with your creating, head on over to Pinterest and see what you can find. 

IMAGINARIUM DESIGNS PRODUCTS:


I hope you have enjoyed my projects today. Thank-you for stopping by and joining me.
Don't forget to leave a comment and a little love, and you will automatically be entered into the draw to win a prize pack of Imaginarium Designs goodies. 

 If you would like to view more of my work, please visit my blog:


Cheers and happy thoughts, xxx

JULES


Saturday, October 17, 2015

Keeping It Simple: A Mini Canvas and Card.

Hello everyone! 
Hope you are having a wonderful weekend. 
Here in Mount Barker, the sun is finally shining and it is a beautiful day. 

I have two projects to share with you today. Firstly, a mini canvas. Secondly, a card. 


This canvas was created on a 4x4 canvas, and is in fact, quite simple to create. It's all about the layers. You start with a large chipboard item as your base, and continue to layer, getting smaller as you reach the top. I have mixed my Imaginarium Designs chipboard with metal pieces, just for a little textural difference.  


The large butterfly colour has been created with two mixed blue glitters - one dark blue, and one dark teal. The smaller butterfly was coloured with Teal Inka-Gold. 


I have used silver Inka-Gold for the word, and platinum Inka-Gold for the doily and bracket mirror (which has been cut in half). 


Here you can clearly see all the different layers. Ive also included some Prima vine branches for added texture and colour, creating more of a visual interest and balance.  


The metallic silver wings have also been covered with silver Inka-Gold. They were originally two different colours. 

IMAGINARIUM DESIGNS PRODUCTS USED: 


.......................................................................................................

I've kept my card sweet and simple, with lots of gold, pink and bling. 


I have added extra gold with a gold ribbon, a gold coated Art Deco embellishment, and a spray of Gilded Gold Glimmermist over the flowers. 


I have balanced the design with some pink rhinestones in the corners, and along the art deco embellishment. 

IMAGINARIUM DESIGNS PRODUCTS USED: 


Thank-you for stopping by today and joining me! Don't forget to leave a comment and a little love, to automatically be entered into the draw to win a prize pack of Imaginarium Designs goodies.

If you would like to view more of my work, please visit my blog:

Cheers, and have an awesome weekend!!!
JULES xxx


Sunday, March 8, 2015

Happiness Is...a card and a layout.

Hello everyone! Julianne here today, joining you with two projects showcasing this month's theme - cards and tags. 

I decided to take a slightly different interpretation of the word "tag". Instead of creating a tag, I decided to create a layout using tags as an embellishment, and as part of the background for the layout. 


I have taken two large manilla tags, and covered them with co-ordinating paper, and used them as my frame and background for my photo. Along with lots of fussy cutting and beautiful Prima flowers, it has created a lovely soft visual effect for my layout. 


Using one of the Imaginarium Designs chipboard tags (see product list below), I have covered it with co-ordinating paper, then layered chipboard brackets, wrough iron pieces, butterflies, twine, lace, and flowers on, and around, the tag. 


I simply coated my title with Aged Gold Embossing enamel to give it an aged, romantic look. 
The Monarch Butterflies have been covered with Prima ink, then coated with Rose Embossing Enamel. I have finished them with a cut-out paper butterfly and Prima crystal, added to the centre.  


The bracket frame, wrought iron pieces, and Edward Relief corner have been coated with a metallic green Prima ink, and then softly dabbed with a Prima white ink, to soften the colour. There is a very soft shimmer to the green ink.

IMAGINARIUM DESIGNS PRODUCTS USED:


.................................................................................................................

My "Happiness Is" card was created with a friend in mind. When opened, the card will read "being your friend" to finish the phrase. 

I can't wait to give this card to my friend! After all, who wouldn't like a card with a beautiful sparkly butterfly on the front? 


The butterflies and wrought iron have been covered with Prima ink, then coated with Tattered Angels Glimmer glaze for a very subtle sparkle. 

IMAGINARIUM DESIGNS PRODUCTS USED:


Thank-you for stopping by and joining me today. I hope you are having a fabulous weekend, and we look forward to seeing you again tomorrow, for more card and tag inspiration.

Don't forget to leave a comment so that you can automatically be entered into our draw to win a fun pack of Imaginarium Designs chipboard.

If you would like to view more of my work, please visit my blog: JULES THE BLING PRINCESS

Cheers and hugs, xxx
JULES