
I hope you have your coffee ready, for I have quite a few photos and a short tutorial of techniques on my Imaginarium Design chipboard to share with you!
I have downloaded a few beautiful photos of 'Old Timers' from Pinterest and just love the opportunities these old, rusted beauties from days gone by will give me to create some grungy looking pages. Who knows what stories they would have to tell from times gone by?

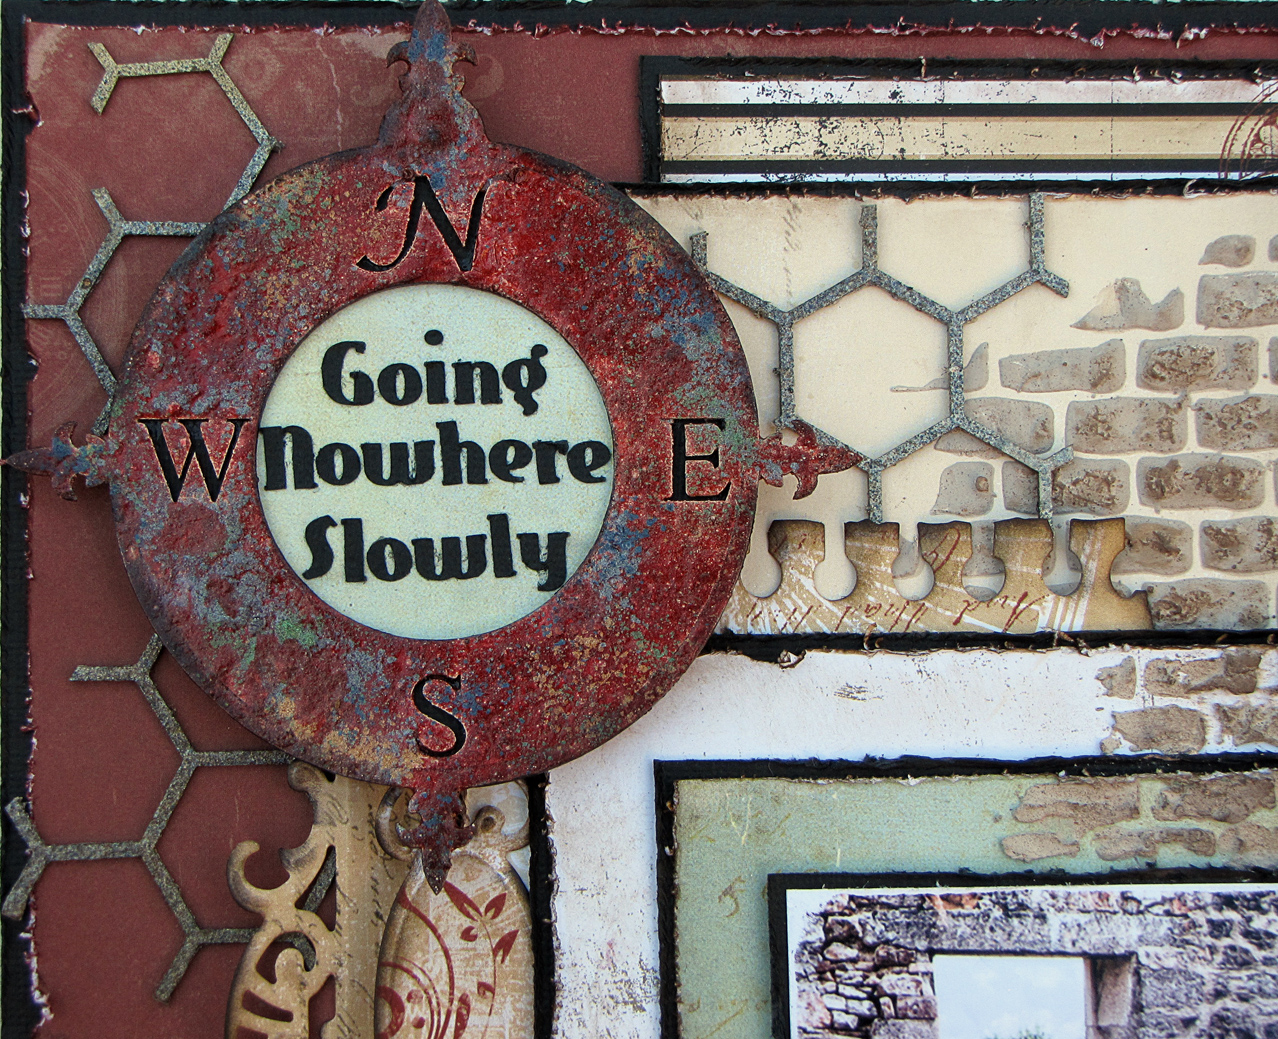
I am so trilled with the look of this compass, the tutorial to create this look follows soon...I sprayed the Honey comb negative with Krylon 'Make it Stone' spray in gold and silver.

Some stamping with a Kaizercraft stamp and a Prima Floral Spray.

Had to sneak in this close up of the luscious texture, I was aiming to extend the wall in the photo onto my background papers..

I will also have a short tutorial on the Hexagons as well...told you to get some coffee! This is the rest of the Floral Spray.


~~~~
Now let's get to some techniques...I am pretty sure many of you know these techniques, but I hope that it will be something new to try for a few of you...

The first step is to cover your chipboard with some foil, be it proper scrapping foil or ordinary kitchen foil. If your foil is on the thin side, I would advise you to do a double layer. If I am using a few pieces of elements, I find it easier to lightly glue them onto a piece of card stock, thus keeping them together and making it possible to work it as one piece...

Next, I place it in an embossing folder and push it through my Bigshot. I used the Sizzic's 'Riveted Metal' folder.

Then we get to the fun part of adding Alcohol inks...Here one can play with any combination of colours you like! I did apply the inks with an applicator Tool, but went in with some drops of Slate directly from the bottle as well. I used the following colours: Ginger, Caramel, Rust and Slate. And now you are ready to place the chipboard pieces on your LO...
~~~

I started with a good dabbing of Pearl Acrylic Paint Dabber

That was followed with a thick coat of Tattered Angels Glimmer Glaze, colour 'Flirty'. Whilst still wet, I used a dry paintbrush to flick some Perfect pearls onto the Glaze. You will want the Pearls to fall in biggish clumps to get this effect. I used Blue Smoke, Perfect Bronze, Pewter and Forever Green on the Compass. Once you are happy with the look, give it a good blast with a heat gun in order to set the pearls and also have the Glaze and dabber bubble for a lovely texture...

These are the Imaginarium pieces I used,

Honeycomb 6x6 : IDS 0054

Large Compass: IDS 0063
Papers are...
Bo Bunny: Timepiece
Timepiece Stripe
Timepiece Tick Tock
Just For You Card
Next I made a card with some Maja papers.


I used the top pieces of the Jessica Flourish. They were inked and embossed with clear Embossing Powder and some 'Bisque' liquid Pearls added.

The beautiful Monarch Butterfly was first inked and then embossed with 'Orbit Olive Gold' Embossing Powder from Lindy's Stamp Gang...I.R.L it has a soft green shimmer to it...


The phrase was embossed with 'Aged Rose' Embossing Powder from Stampenous.
On the card I used the following pieces...

Just for You phrase: IDP 0074

Jessica Flourish: IDFL 0014

Monarch Butterfly: IDT 0031
Maja Papers: Fikka, Chaite
Kladdkaka
En Kopp Te
That then is it for me for this month! I hope you have enjoyed my post and please leave a message, not just for me to know you were here...but it could earn you a price parcel of Imaginarium Design goodies!

When I can look Life in the eyes,
Grown calm and very coldly wise,
Life will have given me the Truth,
And taken in exchange - my youth.
~Sara Teasdale~
wow!! These are so beautiful! I really love the grungy look and texture of the layout! Super cool techniques, can't wait to try them!!
ReplyDeleteThank you Denise...I do hope you will try them and please let me know how it went...!
DeleteJust incredible Pat, I LOVE the compass textures and colors, and that butterfly is just amazing..love your work!!!
ReplyDeleteBoth your card and your lay-out look amazing. I love all the texture that you added!
ReplyDeleteWow beautiful projects.
ReplyDeleteOh wow what a awesome tutorial.....need to try that someday!! Your work is gorgeous I love it hugs Amy ;-)
ReplyDeleteLike the foil & embossing folder on hexagons. TFS :)
ReplyDeleteThank you so much for sharing your creative techniques, I truly love the vintage feel of the layout and the foil and embossing folder idea is fabulous.
ReplyDeleteBeautiful work Patricia...you really are a chippie champion! Love your work and thanks for sharing your tutorial with us...I certainly learnt something new!
ReplyDeleteLove your work Patricia! love the metal work on the chippie! I love that stuff!
ReplyDeleteThank you all for your kind remarks...they are truly appreciated!
ReplyDeleteStunning finishes on your chipboard Patricia :) xx
ReplyDeleteBeautiful ... so beautiful Patricia.
ReplyDelete