Showing posts with label Distress Oxide Ink. Show all posts

Saturday, October 20, 2018

It's a blue October Sandi Spink

The year is flying past...It's October already it's hard to believe. I  have just had the opportunity to attend a fantastic retreat..full of friends and inspiration. Here are a few of the things I was inspired to create.
The first creation was using some of my ephemera from a stop over to my favourite antique shop in Casterton.


 I used a combination of blue toned paint and white gesso for the background of this map page of ephemera from an old book that was falling apart. When dry I used a sewing machine to stitch in straight and zig zag stitches around the black border to define and add texture to the page. I used distress oxide ink to colour the heart, background and # chippie, building layers of a range of papers and natural hessian further adding depth and more texture.


The chipboard I used in this page included:
IDW0094 #instagram etc.
Circles and diamonds IDS0091
Nats hearts 1 IDD0042
My second creation I would love to share was created in my art journal and as I didn't want too much bulk in my book I decided to challenge myself in how many ways I could use one stencil.


The background was blue acrylic and gesso blended together with my fingers as the tool. I used 'Kate Stencil' for my challenge stencil and began with using a scrapper tool to smear white gesso over the stencil. When dry I sprayed Lindy's Danny Zuko Denim over it several times which softened and defined pattern all at the same time. The second technique was stamping over the stencil with a blending tool and Distress Oxide ink 'Denim'. While the ink was still dry on the stencil I turned it over and printed with it like a stamp.  I dried each layer with at heat gun to ensure that it was dry before the next layer was added. The next technique I used was using an Faber-Castell ink pencil and tracing the inside edges then I used a water paintbrush to gently add water to the edge of the marks to make them bleed and blend with the background. I painted the phrase in a white paint with only a slight touch of blue added. To finish off the page I stamped a single dandelion in a grassy spot being blown by the wind.


The Imaginarium products I used were:
Kate Stencil IDMM005

Rest Relax Recharge IDP0194
My last share was a quick tag I made when I realised I had only made 3 instead of 4 project pieces...oops. I was a great way to challenge myself in creating with no plan and going with what felt right in the moment.

I tore up a cardboard box to make the tag, ripping off some of the top layer to reveal the corrugations. After making a hole I tied some white twine through the hole then constructed layers using a variety of papers including an old dress pattern to add some extra dimension. The chippie was coated in Distress Oxide ink 'demin' and placed onto the tag with the layers to complete the look.


The chippie I used in this tag was:

Morrocan border IDB0012
Just for you 4 in a board IDP230
Hope to see you all again soon and happy creating.

Friday, May 11, 2018

Distress Oxides + Chipboard + Mothers Day!

Hi Everyone 

It's Wendy back again with some stuff I haven't played with before ...... oh and that's right it's Mothers Day this Sunday so I have based my cards this month around that theme.  I had purchased some Distress Oxide ink a while ago (they were still in the wrappers) so I thought I might have a bit of a play with these and in particular a saw a technique recently where they were used with prismacolour pencils so I gave it a whirl.  

I have done these cards with two very distinct moods - the first couple have the classic mothers day feel, very feminine with the simple technique of inking the chipboard and then using glossy accents over the top for a nice shiny finish.  If you are new to working with chipboard this is the first technique I always recommend as it is super easy but the finish is just lovely and it's my go to all the time.  


The next couple of cards have a more modern feel about them and this is where I have used the distress oxide ink with prismacolour pencils to create the leaves using Dina Wakley stamps.  


For the next card I have again used the distress oxides to create the background and found this movie reel piece in my "odd & sods" box then I found some movie reel printed acetate and I cut out the images and stuck them to the black piece of movie reel.  I just love this card and for once the photos actually capture the classic simplicity of this card.  The chipboard was sprayed with some black spray. 


What I am trying to show is that chipboard suits any type of card or project and is easily adapted to your theme or mood.

Thanks for stopping by and the list of chipboard I have used is below.

Keep Creating 
Wendy


Chipboard Used


IDW0094


IDW0027


Wednesday, May 9, 2018

Scrapboooking and Cards - With Karyn Schultz!

Hi Imaginarium Designs lovelies!!

It's Karyn here and today I have a Scrapbook page and 2 cards to share made using the gorgeous Cocoa Vanilla Studio Bohemian Dreams collection along with lots of gorgeous Imaginarium Designs chipboard. This was also a class I recently taught at Seriously Scrapbooking in Adelaide.

First up is a scrapbook page. I've used a photo of Jessica with a delicious pineapple drink in Hawaii!
I created the background for this page using Distress Oxide ink pads (peacock feathers, picked raspberry and faded jeans) and a "painting with plastic" technique. Next I added strips of patterned paper down the edges and matted underneath my photo. I then stamped a few wreaths from the CVS Bohemian Dreams stamp set in places on my background. I stamped some hearts and a bird onto white cardstock using the distress oxide ink pads and fussy cut to use on my page. All of the chipboard was coloured using the Faded Jeans inkpad - the oxides give such good coverage on chipboard!

I added a selection of CVS floral die cuts around my page - how gorgeous are they! 
More die cuts, stamped hearts and a chipboard heart were added in the bottom left corner, along with a selection of chipboard words. 
More chipboard and a diecut. I love the watercolour look of the Bohemian Dream collection. 
Imaginarium Designs chipboard I've used includes 


Loolabelles chevrons #2: Code IDDL0022
Next I created 2 cards. The first card uses the same background technique and Distress Oxide inkpads as for the scrapbook page.This was then matted on some paper from the CVS 6x6 paper pad then matted on a 6" x 6" card blank

Then I added a selection of CVS die cuts, and Imaginarium Designs chipboard! 
The next card uses more paper from the CVS 6x6 paper pad matted on a 6" x 6" card blank. Then I added a selection of CVS die cuts, and a gorgeous Imaginarium Designs chipboard flourish!
Imaginarium Designs chipboard I've used includes 

Flourish - new design see instore soon!

Thanks so much for stopping by
Crafty Hugs xx

Karyn

Sunday, December 10, 2017

I Believe In Santa by Leonie Neal-Dawson

Hello Merry Christmas and welcome to my December post, Leonie here with you today. 
I have of course, a Christmas page to share with you today. 
I used an older Kaisercraft Christmas range called mint twist, I like the pink and lime additions to the traditional Christmas reds and greens.

On my page I used the 'I Believe In Santa' phrase and framed either end of it with chipboard flourishes.  I also added a banner to match in with the Kaisercraft die cut banners.


The chipboard on this page has a layer of texture paste added to it and then coloured with Distress Oxide Re-inkers


I Believe In Santa


Banners


Embellishment 4


My second page today is a family themed page featuring a photo taken on Mothers Day with my mother and sisters.
The large Janice flourish on this page has been coloured with ink and painted with Ranger Stickles.
I did the same on the Precious Family title.


Thanks so much for stopping by the blog today.
Happy Crafting and Wishing you a Merry Christmas 
Cheers
Leonie Neal-Dawson.


Sunday, November 19, 2017

Christmas Cards - With Karyn Schultz!

Hi Imaginarium Designs lovelies!!

It's Karyn here and today I'm sharing some Christmas cards made using lots of gorgeous Imaginarium Designs chipboard.
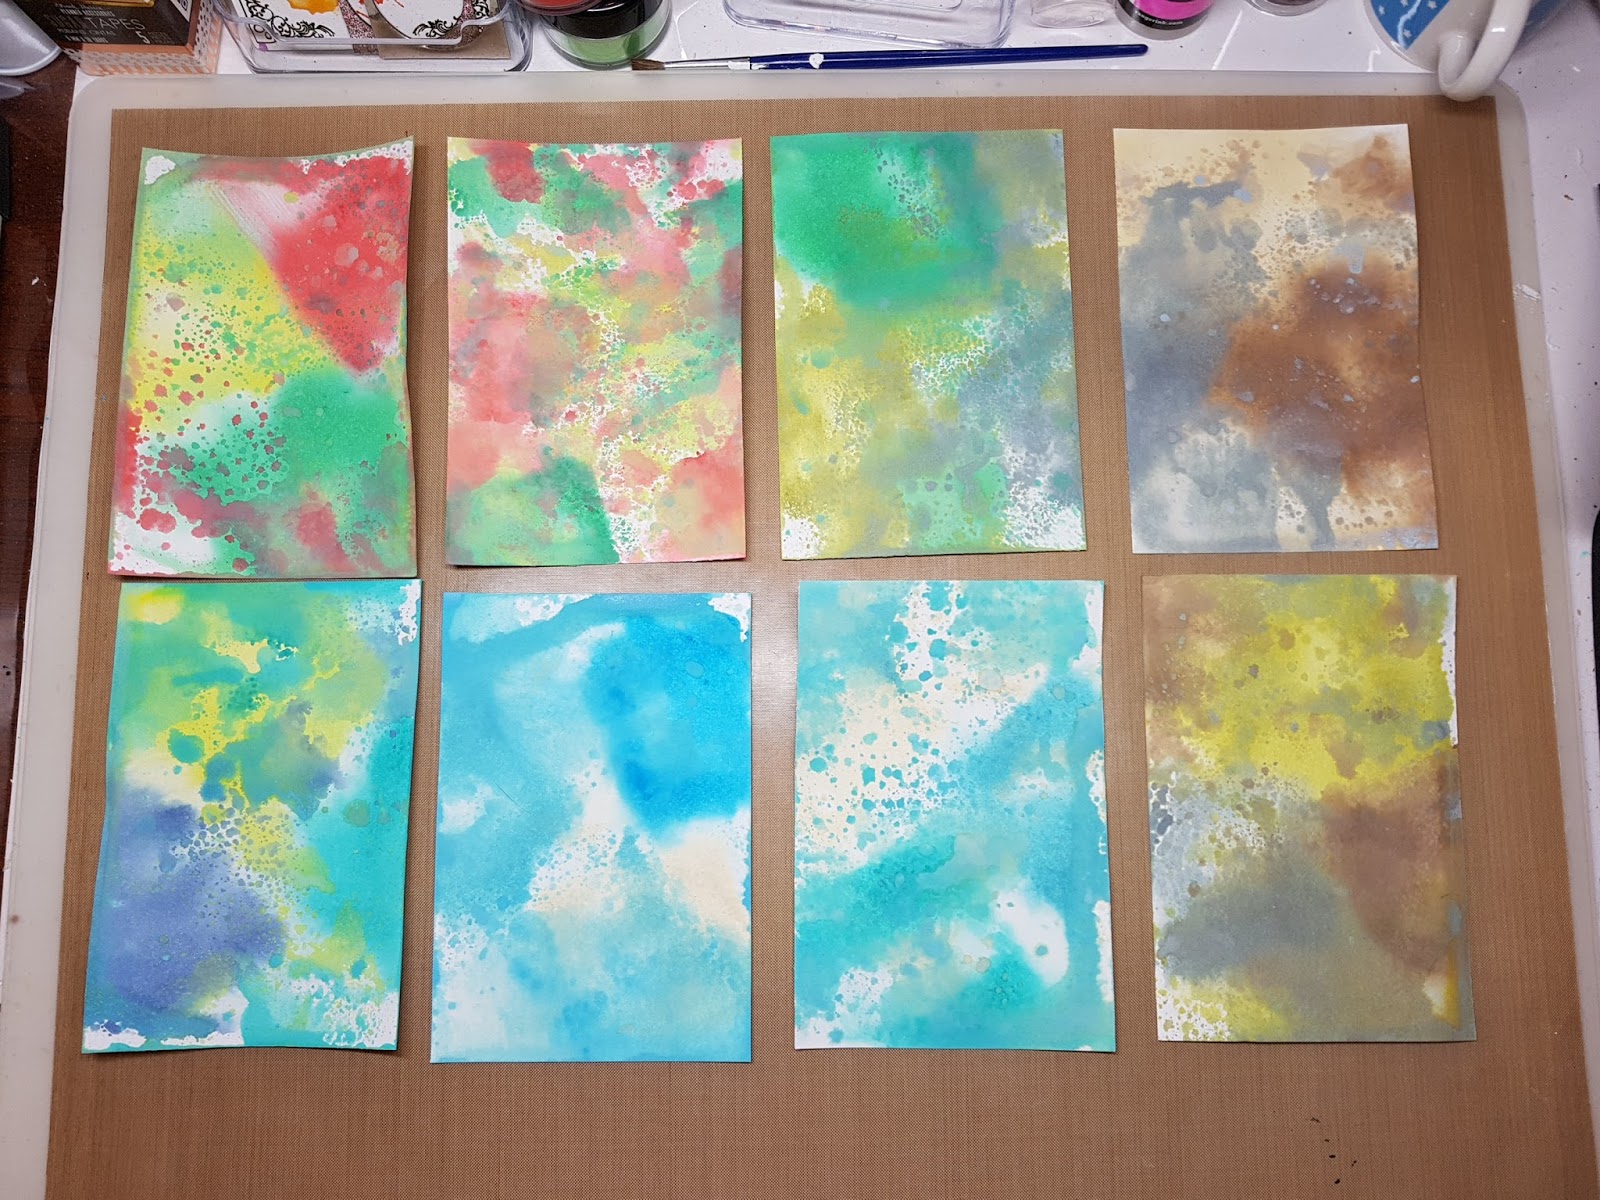
Christmas cards for me are always made in bulk. I dont mean that I make exactly the same card multiple times, but I use similar techniques and templates. I also generally keep Christmas cards on the simpler side so I thought I'd play with my Tim Holtz distress oxides to make lots of fun backgrounds. I tried a variety of colours for the backgrounds - partly because i wanted to see what I liked and also to just have fun!! I worked on each card front individually (size 9.5cm x 13.7cm). I stamped the ink pads onto my craft mat, sprayed with water then "stamped/smooshed" my cardstock into it. The smooshing is done multiple times making sure you let it dry properly between layers.  
This was the variety of backgrounds I made.
For each background I made a coloured cardstock card base then added the chipboard embellishments. For this first card I embossed one of the layers of chipboard for the bauble as well as the Happy Christmas. The other chipboard layers were painted with watercolour pan paints for contrast. 
Look at the lovely shimmer of the Just Blue Colour Blast embossing powder I used! 
The next card has a similar design but I used a Ranger Turquoise antiquities embossing powder  
I love the variation in texture and colour for this embossing powder. 
For this card I used "Apple of my eye" Colour Blast embossing powder on "Happy Christmas" chipboard and the baubles were painted with watercolour pan paints then added some glitter glue highlights. 
For this card I used "Just Blue" Colour Blast embossing powder on the "Happy Christmas" chipboard.  
For this next card I used a silver embossing powder on the "Merry Christmas" chipboard.  
 
More embossing, painting and glitter as well as bakers twine for the bauble strings! 
These large decorative Christmas trees are perfect for a card front. I initially painted them in a variety of colours with my watercolour pan paints but wasnt happy with the result - plain gold paint was far better, with a few red rhinestones. 
 

Hopefully this has inspired you to get out your Christmasy chipboard stash and make some cards :)
 
Imaginarium Designs chipboard I've used includes 

Christmas Tree: Code IDS0060


Merry Christmas : Code IDP0072
 
Happy Christmas : Code IDP0073
 
Thanks so much for stopping by
Crafty Hugs xx
Karyn