
Unicorn wall art
and Mini Dragon Eggs
Well this year certainly is the year of mythical creatures, unicorns, dragons and mermaids are everywhere. I kid you not, my daughter and I went shopping earlier this year and every single shop had something Unicorn in it, even the make up shop, unicorn make up. I looked hard to see if I could use it as paint lol. I have always loved mythical things, from early school years I was fascinated with the Greek and Egyptian gods and legends. We have an extensive DVD collection of all the fantasy and legend style movies. Later in Art College I loved the work of Brian Froud one of the collaborators on Dark Crystal and Labyrinth, he has books available featuring his work and illustrations of Faeries, and the wee folk. This was the inspiration for last months post "the Spriggan". This month I have used the Kaisercraft unicorn and this just lends itself to alteration and applying chipboard to the surface. I hope you like it and are inspired to create one for yourself.

The finished piece would be neat hung on the wall or as I do, placed on an easel, it would also be awesome framed in a large frame for someone very special. I loved it so much I have done two, one in pink and one in teal my favorite colour.

I have layered the surface with lots and lots of texture with the last
layer being metal trinkets and jewels. This is the chance to use
up old jewelry, beads and earrings making each unicorn unique, which is kind of
fitting.

The mane is covered with gel medium and seed beads, then I have added a layer of pony beads to add even more dimension.
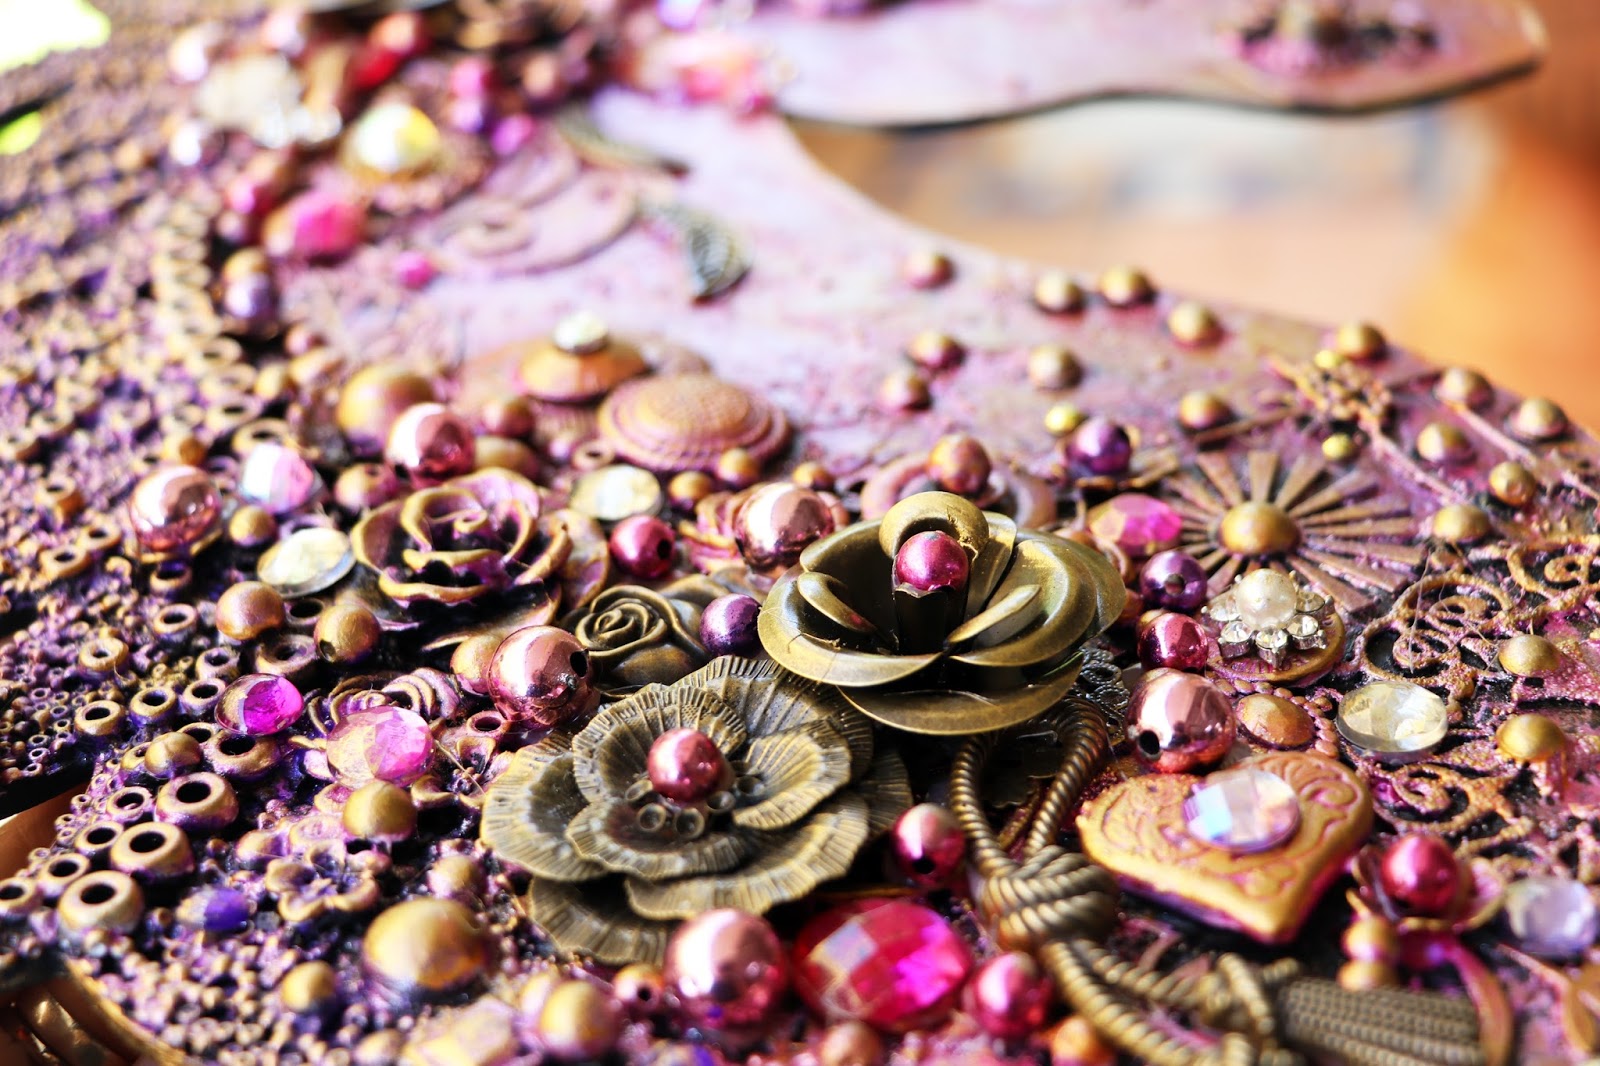
The last layer of trinkets is the chance to use clustering rules to create a mat of shiny texture that work as a whole.

Here you can see the layer of chipboard, this creates base texture and a platform for you to work from, when you add the next layers.

Here is the teal version, this time I have done the mane a little different using texture paste instead.

I have left more of the chipboard base layer showing in the teal
version. Some elements I have painted black, and appplied gold wax , like the resin rose and others I have left alone like the metal rose, but they all have one thing in common "gold" and this is why they work as a group rather than a mish mash of colour.

I have raided my jewelry supplies and added shiny beads and buttons.

An old faux wax seal, makes the perfect eye, layered over with an iridescent button

I just love the ID feathers peeking out, which I have given an ombre look with Inka Gold paint.

Even the gold beads are given a splash of turquoise to make them suit the colour scheme. So always think outside the box when adding colour and shape.
Dragon Eggs
My next project is one of my favourite things to do, make dragon eggs, and since it is near Easter, what better thing to do. Though my eggs don't look like the ones you will want to eat lol

This time I have used smaller styro eggs than I usually do, so the challenge was to find things small enough to adhere to the surface. Luckily Imaginarium make a whole lot of chipboard in mini sizes, which is always something to keep in mind.
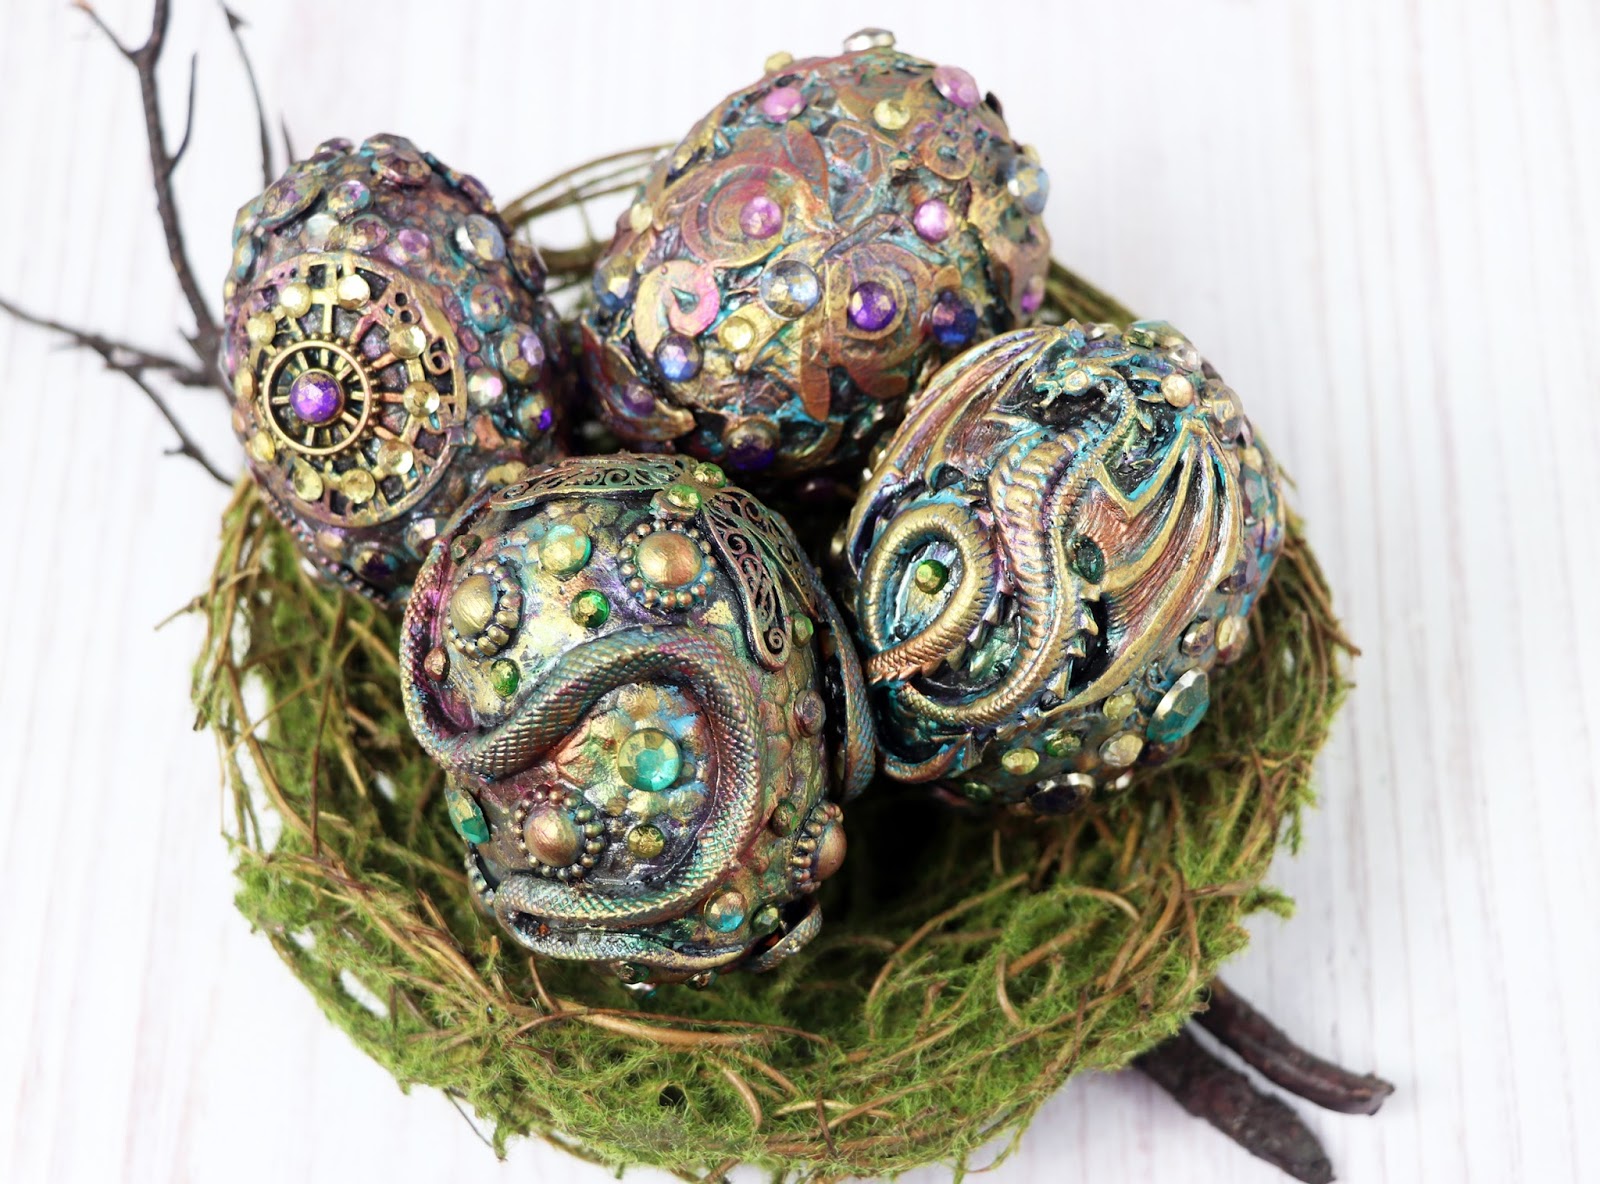
They all fit in this Faux nest perfectly

First is a dragon egg, the resin dragon is heated with a heat gun to
help it mould to the side of the egg, then adhered onto it
with gel medium.

The Second egg, has ID chipboard clock on the top, I have sprayed it with a little water to help it mould to the side of the egg, and adhered to the egg with gel medium.

The Third egg, is just a mish mash of ID chipboard scrolls over the surface, adhered with gel medium, and I have then wrapped it with tissue paper, this helps the chipboard
stay adhered and the bonus is you can handle the egg better while wet.

The Fourth egg, has some ID chipboard dragon flies and plastic snakes added to it along with some bling and pearls.

I love how when you heat the styro foam just a LITTLE it puckers
like dragon scales.
Here is a mini tutorial, and tips on how to make
dragon eggs.

Start with stryo eggs.

Snip up and dampen chipboard, adhere to surface with gel medium and then cover with scrunched up tissue paper.

Here you can see how I have kept the items in place until the medium sticks, I have used pins on the plastic snakes (they stay in place ) and rubber bands over the chipboard.
Then paint with black gesso and dry off carefully.
then layer over your paint and inka gold of choice.
I like to finish with some bling and Vintage gold Alchemy wax to
add more sparkle and shine.
Some of the chipboard I used.


Happy Crafting

No comments:
Post a Comment