
Wooden Christmas Tree and
Christmas Layout
by Sue Smyth

Merry Christmas
Remember in my last post I mentioned the left over wooden kids blocks.
Well this is what I did with them.
I have made a wooden Christmas tree.
You will need
1 set of blocks
1 small cake board
I old ribbon spool
Gel medium
Graphic 45 scrap papers
lots of Imaginarium chipboard.

Some blocks I have left and some I have covered. Down the side I have left the word Christmas
When I arranged the blocks I made sure to spell out the word as it spiraled around .

I have gold embossed stars, numbers and words to place on the sides.

I have used a punch to punch out squares of old Graphic 45 Christmas papers.
This is a neat way to use up all of those postage stamp images they always have.

Add resin shapes and other Christmas elements

Paint one of the chipboard baubles with white gesso. When dry cover with Dimensional magic
and sprinkle with white glitter. Then add rhinestones and a gingerbread man button

With the other bauble I have painted it red, then sprinkledwith white glitter.
Then added a gold embossed star and red rhinestone.
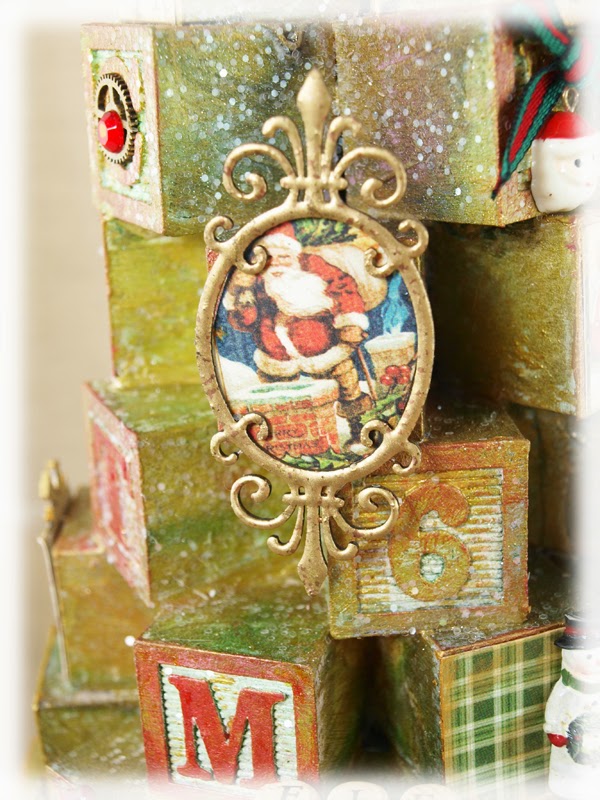
The small bracket frame, is gold embossed and backed with a Christmas image.

The Star is gold embossed and I have added a sunburst behind it and layered over another star.
Then add a large gold plastic gem.

This is how it started off, I have glued it all together with lots of gel medium and allowed to dry
for a few days. Then paint thoroughly with white gesso.
When dry spray with green dylusions and dry brush over gold paint

To make the gold ring around the spool. Simply die cut the centre from the fancy circles
and then gold emboss. If the die does not cut through entirely it is easy to use a blade to cut around the
almost cut shape to finish off.
This can easily slip over the centre of the ribbon spool. I have lifted the top off the spool
to slip this on. But if you cannot do this cut a small slit in one side and slip around the center that way.
Imaginarium Chipboard


Beautiful Layout

I love the look of snow on a layout, I wanted a good contrast with my candlelight photo.
Here are some of my favourite ways of creating a snowy feel.

For the trees, I have painted them with a thin coat of gesso, allow to dry. Then paint with thicker coat of gesso and dry with the heat gun until it blisters and bubbles.
When dry, adhere small pearl sequins across them.

Add pearls and blue rhinestones for shine and bling. Under the rosette I have added a bunch of white cotton
to add to the layered look.

My Favourite way to treat Chipboard
Paint with white gesso Then cover with Dimensional magic Cover with white glitter and shake off excess.
The glitter sinks down into the Dimensional Magic and gets soaked up.
The two advantages are that it drys quickly, and you get very little glitter shed when it is dry.
Make your own Snowy Frame

Paint Chipboard frame with white gesso

Cover frame with Distress Crackle and set aside to dry.
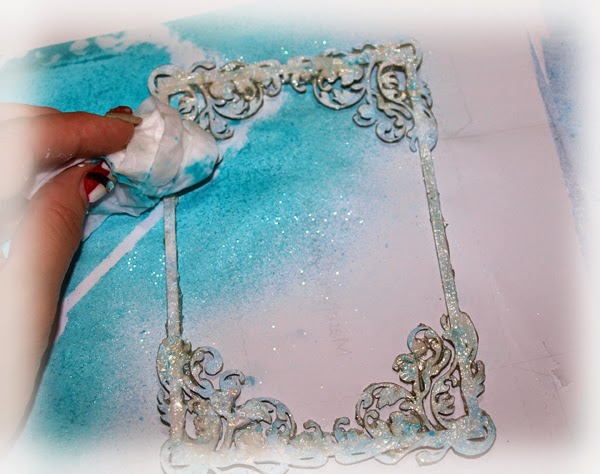
Spray with turquoise glimmer mist and quickly wipe off excess with a wet wipe. Leaving colour in the cracks.

Make your own Snow.
1 Tablespoon of Diamond Dust (or coarse Glitter)
1 Teaspoon of gesso
1/2 teaspoon of Dimensional magic.
Mix all together and store in an air tight container until needed.

Use a paddle pop stick to pat snow onto chipboard frame. If you have a little trouble with it adhering,
just add a little Dimensional magic to the frame first then pat down the snow.
Set aside to dry thoroughly (this may take a while)

I have made my layout on a corrugated card panel, to begin I have peeled off the top layers.
Paint with 2 coats of gesso and sprinkle with a little white glitter. Then layer over papers as desired.
Imaginarium Chipboard


A Little Bonus

This is a little Christmas peg, decorated simply with Imaginarium chip and coated with glitter
Hot glue onto a silver peg and this cango on parcels, hold cards or even on the edges
of wine glasses.

Happy Crafting
And we all love to read your comments!!

What an awesome post today. I love your block Christmas tree and layout. Your step out tutorials are wonderful. Thanks so much.
ReplyDeleteSue you've outdone yourself again! ! I don't know how you come up with such brilliance but this block tree is truly awesome!! LOVE it! ♡
ReplyDeleteBeautiful, Sue!!
ReplyDelete