Showing posts with label Mini Albums. Show all posts

Sunday, July 20, 2014

Projects by Tatiana Klimshina

Hello dear friends!
Tatiana here today to share some ideas using fabulous Imaginarium designs chipboard.
First is cover for London mini album. The background GB flag I draw with acrylic paints. The title is Imaginarium designs chipboard. First - I painted with red acrylic paint, than I emboss it with clear powder twice. After that I make accents with alcohol inks and bronze Patina. 


The second project is wooden box decorated with Imaginarium designs chipboard. I painted with acrylic paints using a lot of different colors.

 Beautiful butterfly!


And this what helps me to make magic!

100mm wide by 123mm high

59mm wide by 167mm high

178mm wide by 104mm high

Thank you! And have creative weekend!

XOXO


Tuesday, April 29, 2014

Different projects by Tanya Palamarchuk

Hello dear friends! 
I hope your spring is warm and cheerful! 
Today I, Tanya Palamarchuck share with you my new projects with chipbboards by Imaginarium Dasign. 
My first project LO, I used a lot of colors and a bright pink color.
This corner I covered with black archival ink and leaves I used a green pigment ink

For the border I used gesso, acrylic and a little white embossing powder

And the word art, I also covered in black archival ink

Here is chipboard that I used:


My second project is vintage minialbum

It includes 2 turns, 4 photos


This corner I covered with gesso and white acrylic, also I used cracle-accent. I got a beautiful view of the age


Tittle chipboard I draw by Disstres ink and also covered cracle.


I used for this project such chipboard:


I hope you liked my work. 
Thanks for visiting! 

Have a great day 

And do not forget to leave a comment, you'll have a chance to win a package chipbord! ;)


Thursday, September 12, 2013

A Vintage Mini-Album

Today, I am sharing with you a Vintage Mini-Album, created using Tim Holtz Idea-ology Cabinet Cards and lots of Imaginarium Designs Chipboard! This is the first mini-album I have ever done and I am so happy with how it turned out - it was super easy to put together and the Imaginarium Designs chipboards were the perfect way to embellish the album pages without adding too much bulk. All the chipboard elements in the album were inked with Distress Ink in Vintage Photo and then dry-brushed with Luminarte Silks Acrylic Glaze in Emperor's Gold.

For the cover, I used the Imaginarium Designs Edward Relief Corners, which fit perfectly along the top and bottom of the Cabinet Card. I also added a resin frame, treated with Distress Ink in Vintage Photo and with some gold highlights using Luminarte Silks Acrylic Glaze in Emperor's Gold - I then painted the frame with Mod Podge Matte to seal the colour. I added some gorgeous Prima roses and some Petaloo flowers, which I sprayed with Tattered Angels Glimmer Mist in Nougat and then splashed with some very strongly brewed instant coffee. The lace on the frame and on the album rings was also dyed with the instant coffee. Along with the lace, the brown tulle and twine make a great embellishment for the album rings. Finally, I added a few Idea-ology metal trinkets by Tim Holtz, as well as a Prima Junkyard Findings Special Screw to use to tie the album closed.
  
For the interior pages, I used a variety of Imaginarium Designs Chipboard to embellish each page. I also did plenty of distressing of the Cabinet Cards by splashing them with brewed instant coffee and adding coffee rings. In keeping with the Vintage theme of the album, I printed all the photos for the album in sepia-tones.
Vintage Mini -Album - Pages 1 & 2
Vintage Mini-Album - Pages 3 & 4
Vintage Mini-Album - Pages 5 & 6
Vintage Mini-Album - Pages 7 & 8
Vintage Mini-Album - Pages 9 & 10
Vintage Mini-Album - Back Cover


Imaginarium Designs Chipboard Used
Edward Relief Corner and 3 Edward Reliefs - IDC0009

Edward Relief Small - IDT0032

Wrought Iron Embellishment A - IDFL0016

Wrought Iron Embellishment B - IDFL0017

Embellishment 4 - IDS0013


Other Materials Used:  
Scraps of Darkness August Kit - Tim Holtz Idea-ology Cabinet Card Frames; Tim Holtz Idea-ology Mini Paper Clips; Prima Tiny Junkyard Findings - Vintage Trinkets - Special Screws; Petaloo Printed Darjeeling Flowers - Wild Blossoms - White; Farmhouse Paper Company - Country Kitchen Junk Drawer; Brown Twine; Brown Tulle.
Stash - Mini Resin Frame - Michael's; Prima Roses; 7 Gypsies Vintage Pin; Tim Holtz Idea-ology - Philosophy Tag, Word Key, Trinket Pin and Pen Nib; Tattered Angels Glimmer Mist - Nougat; Luminarte Silks Acrylic Glaze - Emperor's Gold; Tim Holtz Distress Ink - Vintage Photo; Mod Podge Matte; Heart Lace - Tresors DeLuxe Etsy; Cotton Lace - Michael's; Instant Coffee (brewed) - Nescafe

That is it for me today - I hope you liked my first mini-album - I definitely want to make more of these! Also, don't forget to leave a comment on this post for a chance to win some fantastic Imaginarium Designs Chipboard! 

Saturday, September 7, 2013

A Couple Of Mini Albums And A Tutorial

Hi Everyone,  Today I have 2 fun Mini Albums to share with you and a little tutorial on the box that I made for the Grahpic 45 Tag Album below.  Here's my 1st mini album with the box.


For the mini album box I used the Flowers & Birds On Board along with the Heart Top Picket Fence which I painted with Americana "Butter" paint.  It looks white in this photo but irf it's a soft yellow to match the G45 French Country Paper line that I used for this project.


I wrapped the Heart Fence around the box and adhered with some score tape on each fence post for a firm hold.


Here's a photo of the opening on the side with a G45 Ornate Metal Label Holder.


I used some velcro patchs on the inside of the flap and on the outside of the side panel of the box.


                                           Flowers & Birds On Board (IDS0026)

                                            Heart Top Picket Fence (IDB0005)


Other Products Used:
Graphic 45 "French Country" Paper Collection
Tim Holtz Chain
Prima Keys
Graphic 45 Ornate Metal Label Holder

And for my 2nd project I made a Vertical TP Mini Album.  I was inspired by a friend, Lisa Gregory and found a tutorial on YouTube by Ginger at My Sister's Scrapper.  It was so fun to make and is a great baby shower gift for a scrapping buddy of mine.


For the cover I used the Oval Frames (IDF0002) which I gessoed and then painted with Delta-Ceramcoat "Oyster White" for a little contrast with the white paper I used for the cover of the mini.


And here's a photo of the top with the "New Baby" chipboard


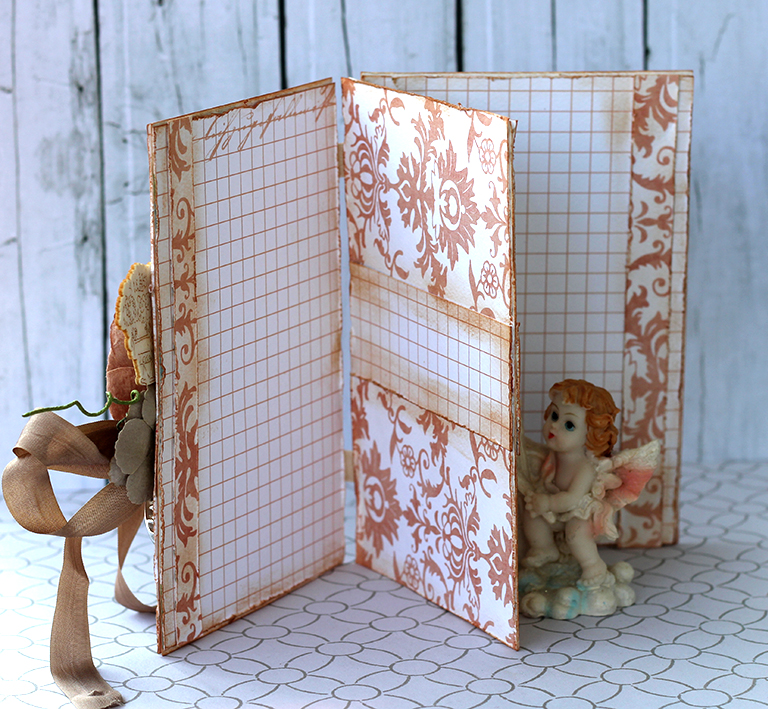
Here's a photo of the inside of the album where I used the TP rolls for the pockets with a binding method by Laura Denison.


I used the Tinies Mini Frames (IDT0012) for the tags with the baby's newborn photos.  I painted them with the Oyster White paint and then painted a little Liquid Pearls "Petal Pink" over that for a pretty touch of pink.

                                                     New Baby (IDW0016)

                                                   Brackets On Oval (IDT0012)

Other Products Used:
Graphic 45 "Little Darlings" Paper Collection

BOX TUTORIAL for the G45 Tag Album project.

1) First you need to figure out how big you want your box for your mini album to be.  I made my a few inches wider and taller than the mini for a good fit with a little room.  Measure the length, width, & height you want your box to be.

2) Make sure to add 1/2" in height of your box to make allowance for any embellies you might have on the cover of your mini album.  My box is 5" wide x 10" long x 2 3/4" high.  So my measurements were  as follows:  Bottom (5 1/4 x 10), Top Width is 1/8 larger than bottom as is (5 3/8), and the Length is same as the bottom (10) and the small side panels are 2 1/4" x 5 1/4".  The Closure panel for mine is 1 1/4" x 10, but you can adjust that to how ever long you want the closure to hang over the side panel.

I used a medium-weight chipboard for the cover.  After you cut all your chipboard to the sizes you want lay them down & distress (if you want) all sides of each panel.


Then adhere with some Duct Tape or Card Stock as I did in this photo


I then adhered the corners with some more tuct tape to complete the box.


After my box was put together I covered each panel with my cardstock using score tape that really adhered well to the duct tape.


After adhering all the card stock adhere some velcro where you wish on the closure panel & the side panel of your box.  And that's it, it's a very simple, quick, and fun box to make.  I learned from Tewtami on YouTube who has a video about boxes.


Thanks for letting me share my work with you today and I hope you enjoy and try some of these fun projects.  Don't forget to leave a comment on our blog for a chance to win some awesome chipboard!!!

For more of my work you can go to:
http://lostcoastscrapper.blogspot.com