
Well, hello there everyone! It's Julianne joining you today, and I will be sharing two projects that I have created, using the wonderful Imaginarium Design chipboard.
Let me start with my dream catcher. This project is not for the faint of heart (as I learnt the hard way, lol!). I had a wonderful time creating this masterpiece, but it definitely took a little longer than I expected. At least I'll know better for the next one. :)

The best thing about this project is the limitless possibilities in regards to colour schemes and the details added. And Imaginarium Designs makes several different doilies, so there are plenty of options for the centre focal point.

I have used the Kate Doily for my centre piece, simply embossing it with embossing powder, and adding rhinestones at several different points to add sparkle.
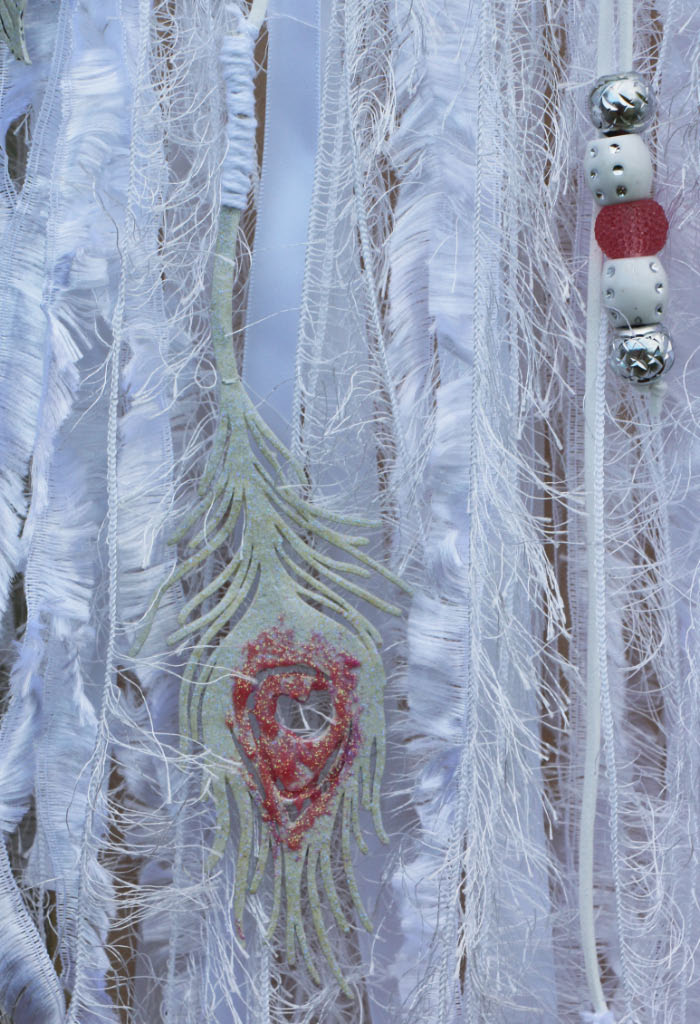
I have used both the peacock and skeletal feathers (in different sizes) on my dream catcher. They have been embossed with embossing powder, then highlighted with pink glitter glue.

I have finished the bottom of the dream catcher with strips of ribbon, both smooth and textured, some leather binding, and beads. On the top half, I have added roses and flowers, randomly placed large rhinestones, and some Prima star vines. I've finished with a spray of pink mist on several of the flowers.
IMAGINARIUM DESIGNS PRODUCTS USED:


.............................................................................................................
My second project is a quick and simple Easter jar, created with an empty Moccona coffee jar.

Seriously, this project took me all of maybe 20 minutes to complete. My daughter asked for a jar to keep her mini Easter eggs in, and this was the end result.

I wrapped burlap ribbon around the jar, and adhered it with extra strong tape. I then added a strip of Easter paper over the burlap and finished with a layered cherry blossom flower, felt flowers and resin roses in the centre. I decorated the edge of the paper with teal rhinestones (because a girl ALWAYS needs a little bling!).
I have glued a rabbit, in a basket, to the jar lid, and finished with two strips of ribbon around the lid edge (one yellow and one teal).

The cherry blossom has been created using Zing Embossing Powder in teal, then layering each piece on top of the other, to create a raised flower.
My daughter now has her mini egg jar, and is very happy. :)
IMAGINARIUM DESIGNS PRODUCTS USED:

Thank-you so much for stopping by and joining me today. It has been a pleasure being able to share my projects with you. Don't forget to leave a comment and a little love, and you will automatically be entered into the draw to win a prize back of Imaginarium Designs goodies.
You can also find Imaginarium Designs on Facebook.
If you would like to view more of my work, please visit my blog:
Until next time,
happy scrapping and crafting,
JULES.

love your dream catcher never considered to use chipboard so much work has gone into it
ReplyDeletelove your dream catcher never considered to use chipboard so much work has gone into it
ReplyDeleteWOW! I am mesmerized by your lovely dreamcatcher! Absolute perfection and I am sure that I can hear the Angels in Heaven singing a glorious tune of thanks for creating it!!
ReplyDeleteTHe bunny mini egg holder is so sweet! I bet your daughter has a mile wide smile on her face!!! TFS!
Beautiful dream
ReplyDeletecatcher!
Carla from Utah
CUTE jar (... I confess, I'm a jar hoarder too) and ABSOLUTELY STUNNING dreamcatcher!!!
ReplyDeleteWOW - I NEED to check out how to make one NOW, feel TOTALLY INSPIRED, especially with the chippie centre!!! Are you thinking about sharing a tutorial?
THANK YOU SO MUCH for sharing :)