
"So Happy Together"

This picture was not taken at the park but at Singapore Zoological Garden years ago. But the visit to the park inspired me to do a layout with nature theme and I went to dig for photos that's related. I have tonnes of photos of our kids to scrap with and many photos I have forgotten their existence. Like this one that I "dig" out. Love my son's laughter and gosh... I used to be slim.
This is a simple layout to put together. I punched the white cardstock at random places and adhere to the background paper, along with strips of Webster's Page papers. Then I spread texture paste over Tim Holtz stencil and painted them with yellow mist. Stamped some vines and butterflies images randomly over the textured area.

Adhered leaves cutouts from Webster's Page paper. Also added in some diecut leaves. For the chipboard shapes and negatives, I gesso them and watercolor over with Twinkling H2O's. Painted the chipboard title with brown acrylic paint.

Here you can see I layered the chipboard flourishes and its negative. I loved to keep and use chipboard negatives, big and small. This is one way of using them. I will be showing another way of using the negatives in another project below (note: this is a long post so please bear with me. Thks).


I cut out the flourish negative, following the outline of it. So one chipboard shape can have 2 designs. You get more out of it, isn't it? So please do not throw the chipboard negatives away. :)
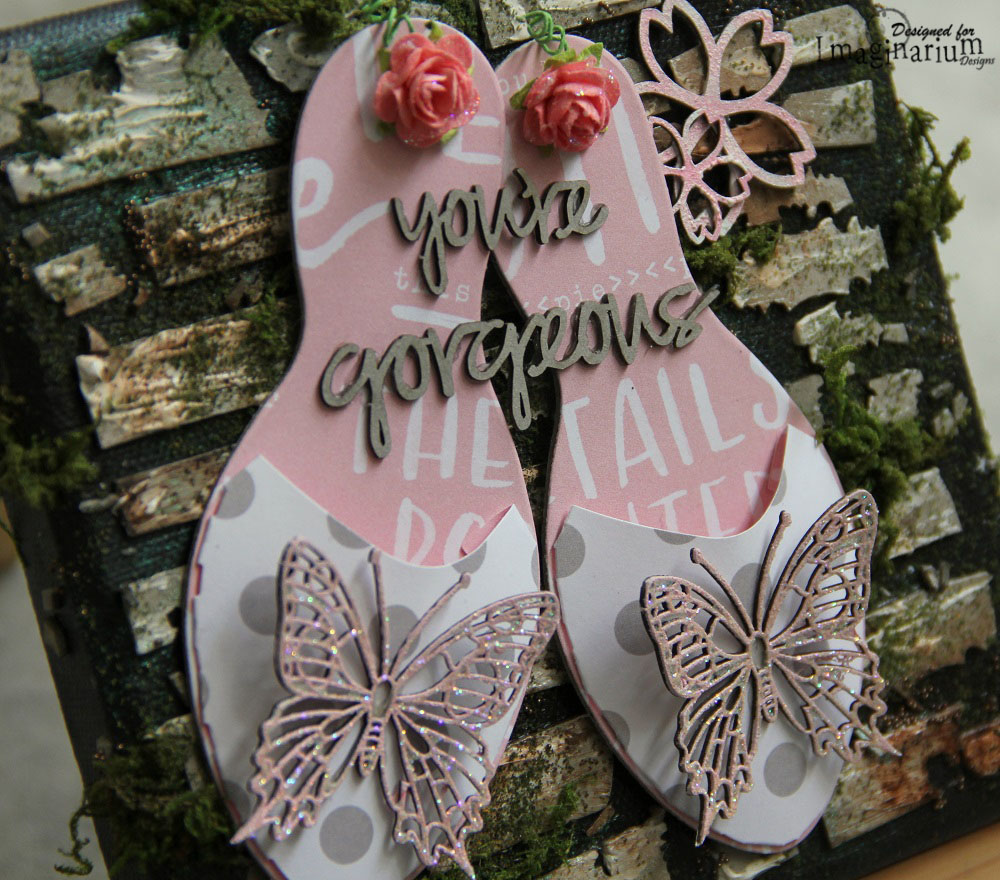
"You're Gorgeous"

Love this canvas. This is greatly inspired by my family's "outing" to Bishan-Ang Mo Kio Park. There's a "river" there with some stone path to cross so I made this canvas of the path (minus the water). I will doing a step by step tutorial for this canvas below.

Here's some close-up pictures of the canvas:


Tutorial for the canvas:

1) I gathered the chipboard negatives I kept and cut up the smaller pieces to tiny bits(batch on the right). One way of using chipboard negatives, especially when the negatives are small. Also use the negatives to layer and pop up the Sizzix diecut shoes (making the "heels" with the batch of negatives on the left).

2) Gesso the canvas with black gesso.


3) Using some more negatives, I cut up strips of them to make the stone pathways.

4) Adhered the chipboard strips to canvas.

5) Randomly spread texture paste over the chipboards with palette knife.

6) Added the chipboard bits and Prima micro beads with Prima 3D matt gel.

7) Misted the chipboards and canvas randomly.

8) Added some Woodland Scenics moss with Woodland Scenics glue. These are miniatures supplies. If you do not have access to these supplies, you can also use any gel medium with fake moss or plants etc.

9) Sprinkle some Woodland Scenics Fine Turf (these are like tiny tiny moss bits) and seal them in with Woodland Scenics liquid cement.

10) Cut and assemble the Sizzix shoes. I added flowers to hide the holes (orginal design had punched holes).

11) Behind the shoes you can see I made the "heels" with the layered chipboard negatives.

12) Gesso and painted the chipboard butterflies and flowers.

13) Adhered the shoes and chipboard shapes with Matt Super Heavy Gel. I leave the chipboard title raw.

14) Added glitter to the chipboard butterflies and the mulberry flowers. Folded up the butterflies wings slightly to give it a 3D look.
Here's the chipboards I have used for both projects:
Layout:


Canvas:


Thanks for dropping by.

awesome
ReplyDeleteCarol you did a great job on these projects. I love the first one with that fabulous picture from Singapore Zoo. And the fabulous flowers. The second project with the shoes is so funny. Whmat I creative way to create man interesting background.
ReplyDeleteThank you for sharing and for the tutorial.
Hugs to you... Monica... Spain
BEAUTIFUL photos and layout!!!
ReplyDeleteABSOLUTELY FABULOUS canvas, the design is a DELIGHT, as is your inspiration and tutorial!!!
THANK YOU for sharing :)
Your floral fantasy layout is gorgeous!!! Makes me wish Summer hadn't gone yet! I adore the shoes canvas and am going to give one a try for my dear friend! Thanks for the inspiration!
ReplyDeleteWonderful idea, from
ReplyDeletethe picture to the
canvas!
Carla from Utah