
Sometimes, when I don't have anything planned for a layout, I will create something totally random. I call these my mix and match layouts, because I have no plans or preconceived ideas on what I want to create. I simply choose a number of techniques and products, and throw them all together. Today, I thought I would show you how this works for me, sharing a step-by-step tutorial on my creative process, for creating a mix and match layout.

"SHINE"
So, let's get started!

STEP 1: Choose the chipboard shapes you would like to use, and glue them to a 12x12 sheet of chipboard, that has been covered with white gesso. I have used a chipboard background, due to the amount of ink and water that will be sprayed on the layout. I have not painted the chipboard shapes.

STEP 2: Using a palette knife, cover the shapes thoroughly with Viva Croco Crackling Colour. I have used white, although it is available in a variety of colours. don't worry about being too neat, and the thicker it is, the better the crackling effect. Let it dry THOROUGHLY.

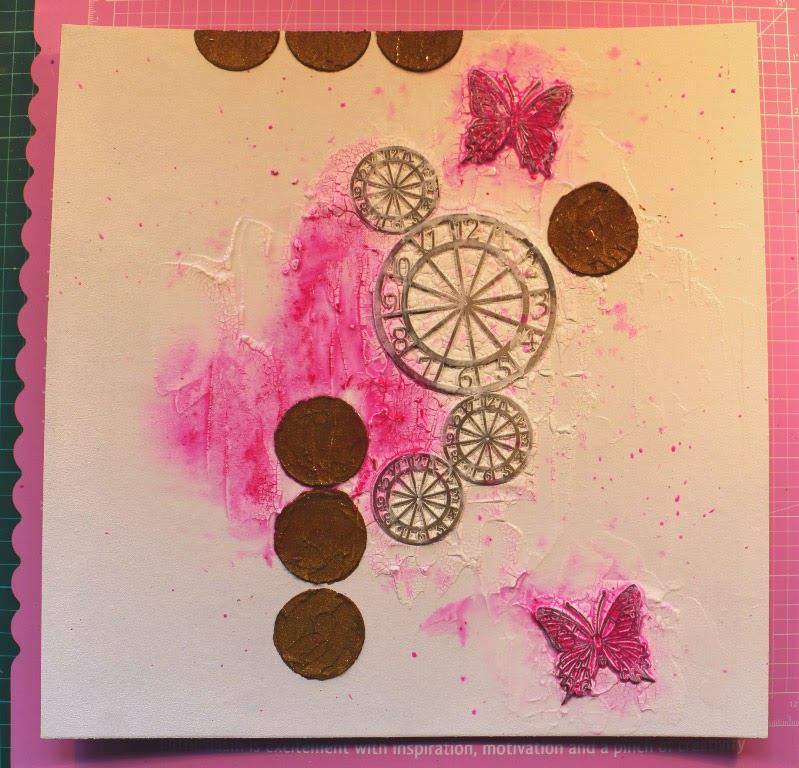
STEP 3: Using the negative image of the clock faces, place it in random places on your layout, and carefully cover the circle areas with Viva Ferro (in gold). This is similar to a metallic texture paste. Again, let it dry THOROUGHLY, otherwise you will have problems as you add your colour.

STEP 4: Start adding colour. I have a really bad habit of reaching for my spray inks first, when adding colour to a layout. This time, I challenged myself to create my coloured background using something else. So I grabbed my gelatos. And because I felt lazy today, I simply rubbed the gelato directly onto the layout, in the places I wanted colour.
STEP 5: Spray those coloured areas with water, and using a fan brush, gently mix the colour and water together, flicking splatters of colour as you went. Use as much water as you need.

STEP 6: Add even more colour. I have added a light pink gelato shade to the smaller clocks, to the far right and left of the layout, and a little on the larger clock. And because I felt that it still needed more colour, I grabbed the Bubblegum Pink Dylusions spray, and added a couple of squirts, which I also diluted with water.

STEP 7: It still needs more colour. Add a few more sprays of the Dylusions ink, add lots of water, then gently tilt the chipboard upwards, allowing the mixture to run down the page.
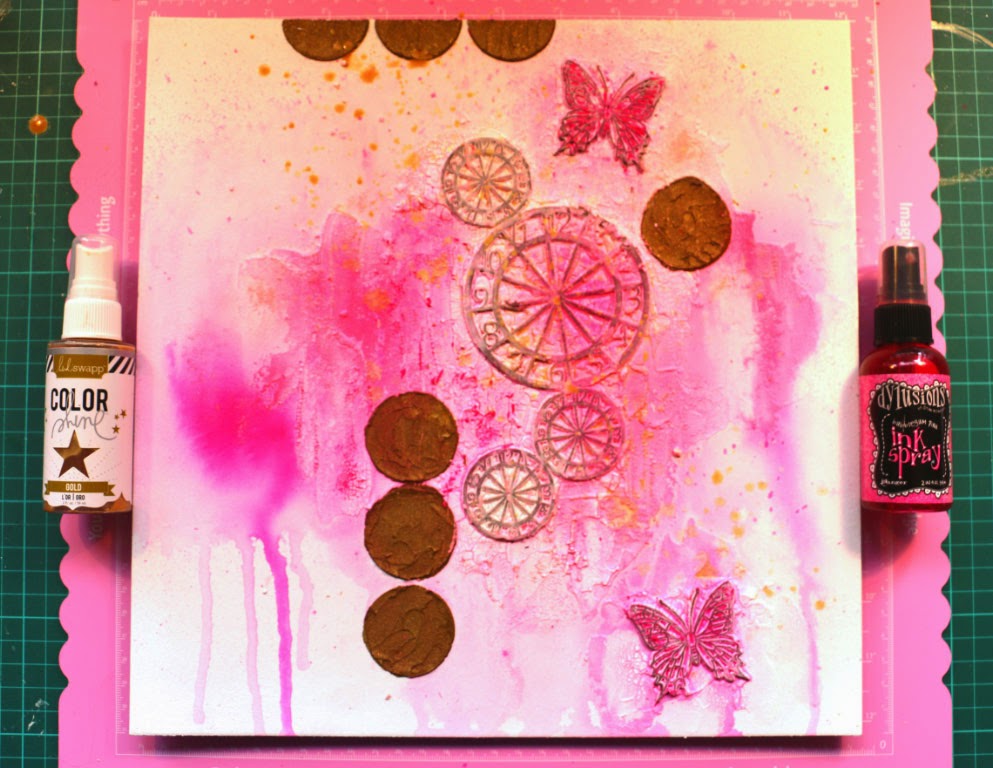
STEP 8: I decided I needed another colour. So I grapped the Heidi Swapp Colour Shine in Gold, and flicked it all over my page. This helped me to establsh that I would use gold as my main accent colour. It is usually around this point, that I start getting a feel for the layout, and the direction in which it will go. Again, let the layout dry THOROUGHLY, before adding anything further.

STEP 9: Now the layering begins. I grabbed random pieces of vellum with various gold designs, and a project life card, that I had torn into pieces, and started layering them in a random order. I keep moving things around until I am happy with it. I added gold epoxy spots to my butterflies. And I added two photos, both raised with foam tape.

STEP 10: Here come the flowers. I grabbed a handful of different pink flowers, and added them randonly around the page, until I was happy with the design. I always adhere my flowers with Helmar Liquid Glue Drops as it gives height and dimension, and it also allows me to change my mind and move flowers, as it is slow drying. I added a few white flowers to the centres of the gold circles to create a different visual effect. And I added three gold word stickers to the top right hand side of the layout.

STEP 11: At this point, you will notice that I have removed the three white flowers at the top of the page, and placed them in other positions. For me, I found the white flowers at the top of the page too overwhelming and heavy, and because I had used Helmar Liquid Glue Dots, I still had time to make those changes. I cut out a large gold star from a Project Life card, added foam tape to the back, and adhered it to the page. I have added more gold epoxy dots around the page, and finished by adding glitter around the edge of the star, and lightly over the clock pieces.

STEP 12: Nearly done. Using Viva Ink, I have rubbed a gold border around the entire edge of the layout. At this point, I step back and take stock. Does it need anything else? This time around I decided it still needed something, so I have added a black border over the gold, and some random journalling.
Here's my finished version. Lots of colour, and lots of sparkle!

Here, you can see the touch of gold glitter on the clock faces.

And doesn't the Vivi Crocko Crackling give such a beautiful effect.

Here's my finished version. Lots of colour, and lots of sparkle!
Here, you can see the touch of gold glitter on the clock faces.
And doesn't the Vivi Crocko Crackling give such a beautiful effect.
IMAGINARIUM DESIGNS PRODUCTS USED:


Thank-you for joining me today. I hope you have enjoyed my tutorial, and that it may assist you with your own creative process.
Don't forget to leave a comment, and a little love, and be automatically entered into our draw to win a prize pack full of Imaginarium Design goodies.
If you would like to view more of my work, please visit my blog:
Cheers, xxx :)
Julianne.

This is gorgeous and what a great tutorial. Thank you! I pinned. https://www.pinterest.com/pin/415386765607632460/
ReplyDeleteThank-you Jean. :)
DeleteBeautiful layout and
ReplyDeletelove all the steps it
took to get the final
look!
Carla from Utah
Thank-you Carla. Enjoy! :)
DeleteJulianne your layout is awesome. You showed your creative proces. Very exciting to read the step by step tutorial.. Love what you ended up with. The crackle product really added something extra. And your gold items.. Waw... But what I also love is your flowers. The mix you made with pink, yellow and maybe a bit orange.. Gosh it's fabulous.. And also I want to tell you how lovely your picture is. Such a sweet pretty little girl !
DeleteThank you for sharing your art. It was such great inspiration.
Hugs from Monica..... Spain
A B S O L U T E L Y
ReplyDeleteG O R G E O U S
layout Julianne!!!
LOVE IT ALL!!!
SERIOUSLY AWESOME tutorial too - I LOVED learning about your CREATIVE process and the detail about each step was FASCINATING - SO MUCH I NEED TO TRY - THANK YOU!!!