Wednesday, July 25, 2012


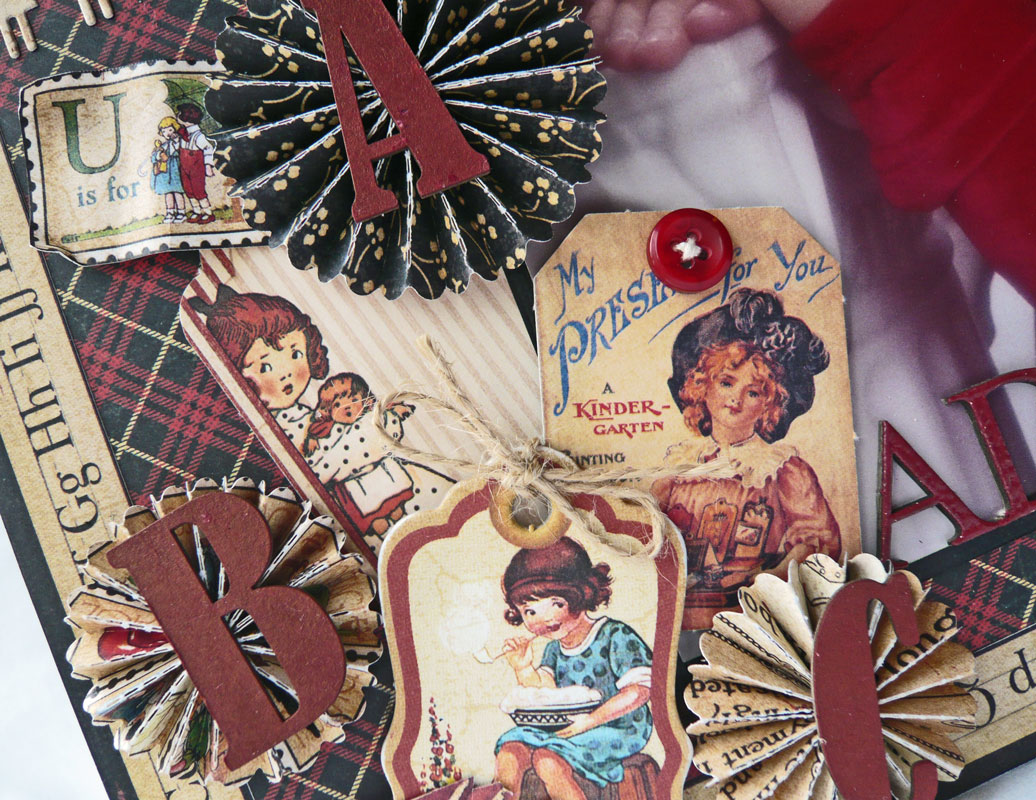
Today I have some of Gloria's wonderful work to share with you. She has two projects for you - a layout and a card. I call Gloria the Queen of Cards, and you can see why. But first up is her layout, Gloria has done one using Graphic 45's Primer range of print papers.


I love they way she has made a frame around her page to set off her photo, and what a cute photo it is.
Our little Girl Title phrase (IDP0025)

Gloria has used one of our titles for her layout, along with some of our Girl Silhouettes.

Shapes Girl Silhouette (IDS0023)


I love the way Gloria has made paper rosette flowers and placed her chipboard shapes and letter on top.
Gloria has inked her chipboard and embossed it with clear embossing powder to give it a shinny finish.


Materials Used:
Adore (IDW0026), Alphabet (IDAUC0001),
Cardstock: American Crafts Black
Designer paper: Graphic 45: Communiqué Typography; An ABC Primer Grammar School, One Two Buckle My Shoe, Alphabet Soup, School Days
Tags: Graphic 45: Playtimes Past, An ABC Primer
Die cuts: Sizzix Tim Holtz Alterations Mini Paper Rosettes; My Favorite Things Paper Doll Border
Ink: Clearsnap Colorbox: Archival Wicked Black; Fluid Chalk Creamy Brown, Blackbird; Donna Salazar Mix'd Media Inx Schoolhouse, Black
Embossing powder: Hampton Art Stamps Clear, Black
Trims: DMC Floss Ecru; Really Reasonable Ribbon Natural Twine
Button: Buttons Galore and More
Adhesive: Aleene's Tacky Glue; Glue Dots Adhesive Dots Craft; Scotch 3M tape runner; Scrapbook Adhesives by 3L foam squares
What a lovely layout for a very special Little Girl, one to be treasured for always.

For her card, Gloria made a Happy Birthday Card with a eclectic feel to it. I love the way Gloria has tied all the elements of her card together.


Just look at the finish Gloria has got on her butterfly. To get this finish, you will need to ink your chipboard, then emboss it with clear embossing powder. To get a thick layer, you need to build up the embossing powder layer by layer and heating it between.


IDT0014 Small Butterflies


Just look at all the detail in this little cluster, this is what makes Gloria's cards stand out from everyone else's.

Small Clock Face (IDS0036)


Supply List:
Imaginarium Designs Chipboard: Sentiment (IDW0014),
Swirl Corners (IDC0002), Small Butterflies (IDT0014), Small Clock Face (IDS0036)
Cardstock: Bazzill Basics Nightmist, White
Designer paper: Authentique Genuine 6x6 pad
Die cuts: Spellbinders: Labels Four, Labels Four Small
Ink: Clearsnap Colorbox: Pigment Smoke Blue; Archival Wicked Black; Watermark; Smooch Spritz Vanilla Shimmer
Pen: Sakura Gelly Roll Star Dust
Embossing powder: Hampton Art Stamps Clear; Cosmic Shimmer Arctic Black Aurora;
Trims: Really Reasonable Ribbon White Corsage Ribbon
Embellishments: Tim Holtz Idea-ology Film Strip, Light Bulb; Maya Road Ticket; Wild Orchid Crafts Flowers
Wire: Artistic Wire Silver 20 Ga
Adhesive: Aleene's Tacky Glue; Glue Dots Adhesive Dots Craft; Scotch 3M tape runner
Who would not love to receive a card from Gloria like the one she has for us today.
Once again Gloria has done two lovely projects for us to be inspired by.
to see more of Gloria's work visit her blog.
Gloria Stengel
Thanks so much for looking, please leave a comnment for Gloria, who will enjoy reading them.

Monday, July 16, 2012

Pretties from Larissa ......

Hello there
Today I'm sharing this gorgeous page by the super talented Larissa


Larissa has crated this using the sweet Prima range, "En Français".

The ID chipboards she used: Phrase (IDP0047) and an upcoming release ..The key to my Heart set.


I so love Larissa's style and her creativity with our chipboard!

Thanks for sharing Larissa 

Have a great day & dont forget to leave a comment to win - I'll draw one lucky name on Wednesday


Friday, July 13, 2012

It's A BOY Thing ....


Hello again, Natalie here sharing the love today!

Today I am sharing a super cute boy page I created using Echo Park Papers and Imaginarium Chipboard!


As most of you know, creating boys pages can be a little more challenging but there is such an amazing range of male chipboard at ID making things a lot easier for you!

I used a brand new title - designed especially for this page - it's such an honor to be able to design for scrapbookers - knowing what works on a page and what sizes they need to be is really important to the design process.

The Circle Border is the 8inch size - I cut it down to stretch across the page to make it appear longer.

Circles Border (8") IDB0008


Both Chipboards have been painted with Black Spray Paint - we have found that this give a really great dense coverage that does not fade.


This gorgeous little man is Jackson, he is my next door neighbor and is just the cutest little person to Scrapbook!

Thanks for stopping by and dont forget to leave a comment to win some new release chipboards!

Have a great weekend!
Natalie


Thursday, July 5, 2012

Creative from Head to Toe!

Hello Everyone
Today I have a lovely project from Asuka to share with you. She has created a special Mini Book. I must admit that when I saw the photo's of her book I was taken by surprise. What an interesting theme for a mini book, but now I have seen her toes, I can understand why you would want to make a book to match.

She has made her mini album to match the colours of her fingers and toes.


Just look at the lovely front of her cover. She has even included a set of nails on the her cover


The back is just as beautiful.

 Just look at the finish Asuka had put on her chipboard. I love the way she has the colour fading down the letters. Asuka has used perfect pearls on her oval frame to create little dots. She is so clever and her work is always beautiful.
Asuka has a real talent for layering and placing all her elements together. I wish you  could see in detail the back ground of her covers. Asuka always does the most amazing backgrounds before she even starts her projects. Again she has created another lovely project to share with us.
To see more of her work and her fingers! Check out her blog.
Asuka Miyamoto