For the mini album box I used the Flowers & Birds On Board along with the Heart Top Picket Fence which I painted with Americana "Butter" paint. It looks white in this photo but irf it's a soft yellow to match the G45 French Country Paper line that I used for this project.
I wrapped the Heart Fence around the box and adhered with some score tape on each fence post for a firm hold.
Here's a photo of the opening on the side with a G45 Ornate Metal Label Holder.
I used some velcro patchs on the inside of the flap and on the outside of the side panel of the box.
Heart Top Picket Fence (IDB0005)
Other Products Used:
Graphic 45 "French Country" Paper Collection
Tim Holtz Chain
Prima Keys
Graphic 45 Ornate Metal Label Holder
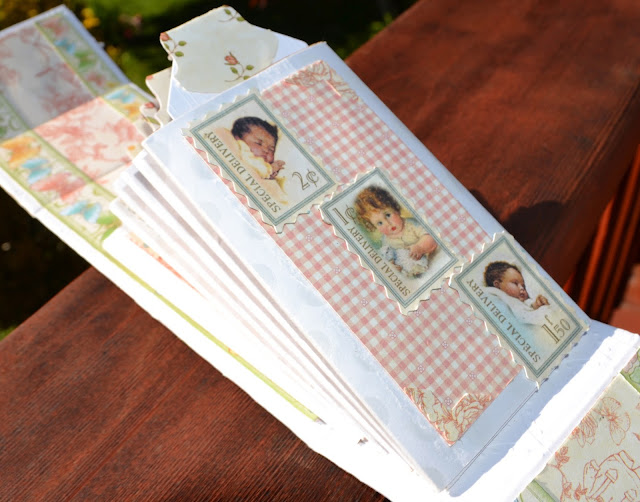
And for my 2nd project I made a Vertical TP Mini Album. I was inspired by a friend, Lisa Gregory and found a tutorial on YouTube by Ginger at My Sister's Scrapper. It was so fun to make and is a great baby shower gift for a scrapping buddy of mine.
And here's a photo of the top with the "New Baby" chipboard
I used the Tinies Mini Frames (IDT0012) for the tags with the baby's newborn photos. I painted them with the Oyster White paint and then painted a little Liquid Pearls "Petal Pink" over that for a pretty touch of pink.
New Baby (IDW0016)
Brackets On Oval (IDT0012)
Other Products Used:
Graphic 45 "Little Darlings" Paper Collection
BOX TUTORIAL for the G45 Tag Album project.
1) First you need to figure out how big you want your box for your mini album to be. I made my a few inches wider and taller than the mini for a good fit with a little room. Measure the length, width, & height you want your box to be.
2) Make sure to add 1/2" in height of your box to make allowance for any embellies you might have on the cover of your mini album. My box is 5" wide x 10" long x 2 3/4" high. So my measurements were as follows: Bottom (5 1/4 x 10), Top Width is 1/8 larger than bottom as is (5 3/8), and the Length is same as the bottom (10) and the small side panels are 2 1/4" x 5 1/4". The Closure panel for mine is 1 1/4" x 10, but you can adjust that to how ever long you want the closure to hang over the side panel.
I used a medium-weight chipboard for the cover. After you cut all your chipboard to the sizes you want lay them down & distress (if you want) all sides of each panel.
Then adhere with some Duct Tape or Card Stock as I did in this photo
I then adhered the corners with some more tuct tape to complete the box.
After my box was put together I covered each panel with my cardstock using score tape that really adhered well to the duct tape.
After adhering all the card stock adhere some velcro where you wish on the closure panel & the side panel of your box. And that's it, it's a very simple, quick, and fun box to make. I learned from Tewtami on YouTube who has a video about boxes.
For more of my work you can go to:
http://lostcoastscrapper.blogspot.com


Oh wow this is amazing I so love both projects!! You did a wonderful job Karen hugs Amy
ReplyDeleteBoth are amazing. Thanks for the great pictures and instructions.
ReplyDeleteWonderful projects! I love boxes and now I have some directions on getting started on making some. Thank you for showing this!!
ReplyDeleteAwesome albums and box; great tutorial ! TP Roll album... so amazing! Love how you did those frames ... so much fun inspiration !!
ReplyDeleteFabulous projects- thanks for sharing!
ReplyDeleteAwesome project. I'll for sure do this. Thanks for sharing.
ReplyDeletePatti
I absolutely love it.. I get so much inspiration from watching your stunning creations...TFS. Hugs Lene
ReplyDeleteIt is beautiful, as always you amaze me, thanks for the tutorial, i am gonna try to make myself a box.....thank you :)
ReplyDeleteAwesome projects. Love the chipboard designs. They would be awsome to work with. Thanks for the chance to win some.
ReplyDeleteMy chicken and country loving friends are all going to want one!
ReplyDeleteI love the label holder idea.